3D Animation Workshop: Lesson 21: The Art of Glass | 3
|
|
Lesson 21 - The Art of Glass - Part 3
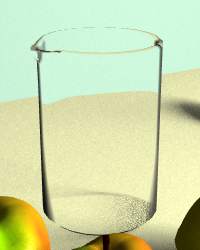
Take a look at our most satisfactory version again, and notice the specular highlights on the rim.

How much difference does this make? Let's strip out the specularity and see.

Glass is a highly specular surface, and the highlights do indeed make a difference. When a surface is highly transparent, as this beaker (set to 99 percent transparency), the highlights are not so noticeable. But if the transparency is decreased so that the beaker is more translucent than transparent, the same strong specular settings are much more noticeable and much more important.
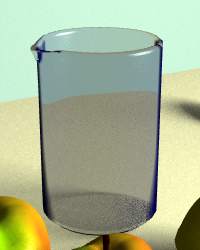
For example, here is the beaker in a translucent blue glass.

The specularity is now a more significant element of the effect. It is for difficult to see through the beaker and thus the contribution of the refraction of the horizon line is reduced.
This change of color also help us to understand more precisely what transparency means as a material or surfacing parameter. Transparency is a dissolve of the diffuse color alone. Even with a maximum transparency setting, the surface, though displaying no color of its own, will reflect specular highlights.
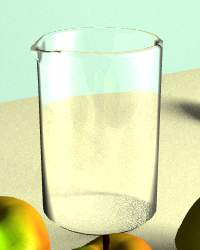
If we can generate specular reflections off a transparent surface, we can certainly generate true reflections. Here is the beaker set to a low level of ray-traced reflection.

Note what reflectivity adds at this low level of intensity. The effect is mostly to pick up general light patterns from the environment, although the basic shapes of the fruits are somewhat discernible in the reflection surface. Is this a better or more convincing object? In some contexts, perhaps, it might be, but the brilliance conflicts with the gentle mellowness of the scene we have set. Even though some degree of reflection of the beaker might be more "realistic," it may be less esthetically successful.
Another problem is sheer rendering time. This tiny image took over 11 minutes to render on a Pentium Pro 200 due to the ray-tracing of the reflections. But, just as with the spoon in the last lesson, there is an alternative.
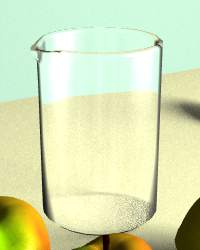
The following image uses a cloudy, random-like grayscale bitmap--the very same one we applied to the spoon. The reflection pattern was taken from this image, rather than ray-traced, and the rendering time was reduced to less than 3 minutes.

I leave it to your judgment whether the additional rendering time of the ray-traced version was worth the added realism, especially in the context of a larger scene.
We could go on forever exploring the surfacing in our still-life, but it's time to leave this project behind on move on to new horizons. See you next time with a brand new topic.
| To Return to Parts 1 and 2, Use Arrow Buttons |
|
Created: September 16, 1997
Revised: September 16, 1997
URL: https://webreference.com/3d/lesson21/part3.html


 Find a programming school near you