3D Animation Workshop: Lesson 21: The Art of Glass | 2
|
|
Lesson 21 - The Art of Glass - Part 2
Take a good look at the isolated image.

We mentioned in an earlier lesson that the refraction (distortion) of the checkerboard pattern on the wall through the glass was influential on our perception of a curved glass surface, and especially the difference between viewing the pattern through two glass surfaces and only one (as at the top of the beaker). Let's strip out this effect for analysis purposes by making the wall a single diffuse color.

The refraction is still present in the surface, as we can see from the distortion of the line where the counter-top meets the wall. And it still looks like glass. So let's take the refraction parameter out completely.

Now here's an unexpected development! By taking out the refraction parameter (meaning setting it to 1.0), the horizon line is now straight and not curved. This was the result we were looking for. But something else has happened. The sides of the beaker have now divided into separate lines, most unrealistically.
The beaker was modeled with inner and outer surfaces, just as a real beaker would have. But unlike its real counterpart, the model (like all 3-D models) is only surfaces, with nothing between the inner and outer surfaces of the glass. The beaker is therefore something like a cup (with very thin walls) placed inside a slightly larger cup (also with very thin wall). This difference between our model and a real object is now quite apparent.
So refraction did us a couple of important favors in selling the idea of glass. First it distorted lines and patterns behind the object and seen through it. Second, and perhaps unexpectedly, it distorted (in this case, blurred) the edges of the surfaces of glass object itself as seen through the surfaces closer to the viewer. If you look at a real glass object (or even a photograph of one) you will immediately recognize that it is the complex lighting effect at the edges of the object that make an object appear to be made of glass (rather than merely transparent). The edge effect is due to refraction.
Refraction is a computationally intensive ray tracing technique, and the refraction that occurs at the edges of a true glass object is extremely complex. So applications often contain methods that fudge the effect. Using Lightwave for this project, I chose the "opaque edges" option for my transparent surface. As can be seen clearly in the unrefracted image last displayed, this method essentially drew black lines around the edges of the beaker surfaces (both inner and outer). When refraction was applied, these overlapping edge lines blurred into each other, creating a fairly convincing effect without actually attempting to compute all the complex refraction that occurs in physical reality.
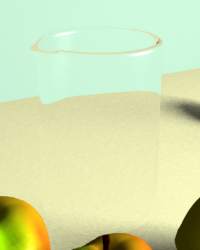
What would happen if we removed this "opaque edges" option?

Without the "false" edges, the bottom surface completely drops out and the sides of the beaker are distinguishable only because of the distortion of the horizon line. In other words, the object is now truly transparent. The top edge is now visible only because it is refracting the surface color of the table.
So edges are critical, as is refraction generally. But there is another element to the equation.
| To Continue to Part 3, or Return to Part 1, Use Arrow Buttons |
|
Created: September 16, 1997
Revised: September 16, 1997
URL: https://webreference.com/3d/lesson21/part2.html


 Find a programming school near you