3D Animation Workshop: Lesson 13: More About Surfacing | 3
|
|
Lesson 13 - More About Surfacing - Part 3
Here's the last image again, for reference. Like all the images thus far, the texture effect has been created by directly varying the surface color--either by modifying the diffuse color values or by modifying luminosity.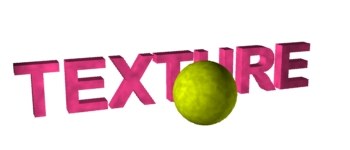
All this is preparing us to understand the most important way in which surface texture is created.
Look at the following image.
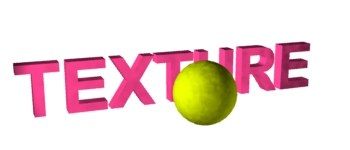
It certainly looks a lot like the one above, but it was created in a radically different way. A single diffuse color value is used for each object, but a BUMP MAP is applied. A bump map does not assign a color or lighting effect directly, but rather attempts to simulate surface relief in a more realistic way. When a bump map is applied to the surface, lighting calculations are made for each pixel as if the surface was raised or indented at that point. This method therefore simulates the effect of light on a textured surface without the necessity of actually working all that detail into geometry of the model.
The previous example looks very much the one before it, and I have presented it to stress that bump mapping is ultimately another method for varying the surface color of a object. Bump mapping really begins to distinguish itself from other methods of creating texture when we apply the right kinds of maps. A blurry map, such as we have been using thus far, creates vague textures. But more sharply defined maps, with strong contrasts, will bring out strong relief.

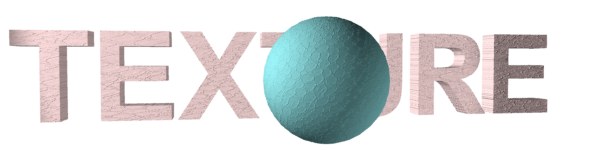
The image is rendered larger, and the greater pixel space (and therefore resolution) brings out the sense of texture. Fine texture is evident only on images of at least a minimum size. The bump map here is a procedural map that creates a crinkled paper effect. Notice how much more convincing the texture is on the sphere than it is on the text. A curved surface necessary reveals more texture than a flat one.
By changing the input values (the parameters) used to create the procedural bump map, we come up with something rougher, but also more visible on the flat text.

As the underlying diffuse color gets darker, the relief effect of bump mapping is reduced. Look at this example using a slightly different mapping pattern.

This makes sense. The effect of bump mapping (or any of the other texture effects we've explored) depends upon a delicate shadowing pattern generated across the surface. If the underlying object is already dark, the range of shades to black is necessarily reduced.
We have been using procedures to create our bump maps, but bitmap images make outstanding bump maps. Photographs of interesting textured surfaces can be used to apply a surface texture. The bump map uses only the grayscale data of the image, with the lighter parts of the image producing the greater relief effect, and the darker parts producing a lesser relief effect. To create a good bump map, an image must have strong contrast between dark and light.
In the following example, a photograph of a snakeskin leather surface is applied as a bump map to our objects. The underlying diffuse color values are made very light to reveal this delicate texture. Notice again how much more effectively the texture is revealed on the sphere than on the flat surface of the text.
To close the circle we began in Lesson 12, we apply the same bitmap image, in full color, as a texture map as well as a bump map. Remember that a "texture map" is a diffuse color map, and that the bump map is the means of creating the texture. I know it's confusing, but you'll get it.

This method of using the same image as both a texture map and a bump map is very common and is very easy to do because all the settings for both of the maps are the same.
| To Return to Parts 1 and 2, Use Arrow Buttons |
|
Created: June 30, 1997
Revised: June 30, 1997
URL: https://webreference.com/3d/lesson13/part3.html
 Find a programming school near you