3D Animation Workshop: Lesson 103: Modeling the Character | 2
|
|
Lesson 103 - Modeling the Character - Part 2
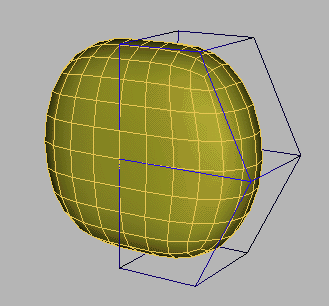
This setup has some disadvantages in obscuring the control mesh, but it will be the best option for most people. In the next image, you can see how adding a new row of edges to the control mesh, and translating one of theses edges, affects both sides of the subdivision surface model. (Note how I adjusted my colors  both the material diffuse colors and the object colors  to get a more readable result. )

Now we're ready to start on the character. Once we have correctly defined the basic branching architecture of the human form, we can refine it in any direction we choose.
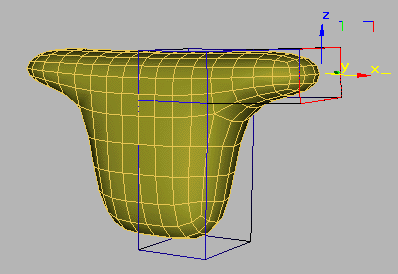
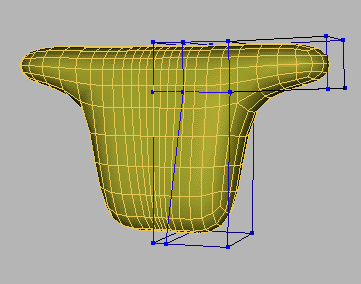
We'll start by extruding out a quad on the side to create an arm  actually both arms at once due to the mirrored instance. I moved up the row of edges created in the previous image to prepare for the extrusion.


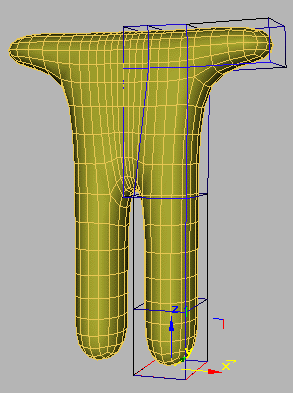
Now we can extrude the leg. I've been simplifying things for instructional purposes by making single extrusion units to be translated and divided later on. Once you know what you're doing, it will generally be easier to make multiple extrusions in succession to create rows of edges from the start. Here, the leg is built in two extrusions. You make want to try building it in five or six, and using the outlining spinner to scale each unit as you go. That will speed things up quite a bit.

| To Continue to Part 3, or Return to Part 1, Use Arrow Buttons |
|
Created: October 10, 2000
Revised: October 10, 2000
URL: https://webreference.com/3d/lesson103/2.html


 Find a programming school near you