Camtasia Studio Video Tutorials: Part 2 | 4
[next]
Camtasia Studio Video Tutorials: Part 3
By Nathan Segal.Since writing the last tutorial, I was contacted by one reader, Chad Wandler, who is involved with PR for Camtasia. Among other things, he offered me access to Camtasia Studio 4. What could I do but accept? In one of his messages to me, he said: "One of the most useful features in version 4 are the audio enhancements so regardless of microphone, machine hum, pops, cracks, etc., it's quick and easy to clean up audio quality, something that's a common problem, especially among new users." We'll look at those in the last tutorial.
In this tutorial, we'll cover another method of recording video, Picture in Picture (or PIP) and editing the timeline. PIP can be repositioned or resized on your screen unlike the technique shown in the previous tutorial. If the PIP is covering important parts of your presentation, you can reposition it.
To use PIP you need a recording by Camtasia Studio that includes both a screen video and camera video. Another option is to use two separate videos. In this particular example, we'll work with two separate videos, one of these will use a Webcam connected to a USB port. Note: The camera must be connected and turned on before starting Camtasia Studio. You can record the video while working on a project or separately. If done separately, the video will be stored in the Clip Bin. In this case, we'll record the video as part of an existing project.
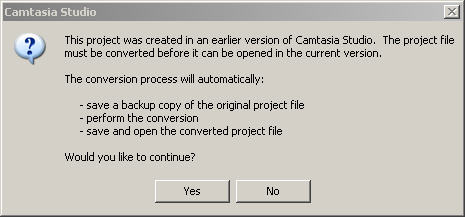
In this case, I've opened a project that I completed in Camtasia Studio 3. I was presented with the above message, which let me know that my project file had to be converted to the Camtasia Studio 4 format. As you can see, the dialog informs you that it will save a backup of the original file, convert it, then save and open the converted file.

When I chose "Yes," the projected was converted successfully and marked by the above message. I clicked on OK and the project opened.
Recording the Camera
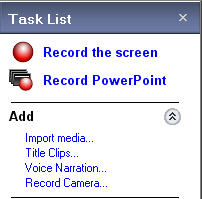
The next step is to Record the Camera. To get started, click on the Record Camera link under Add in the Task List.
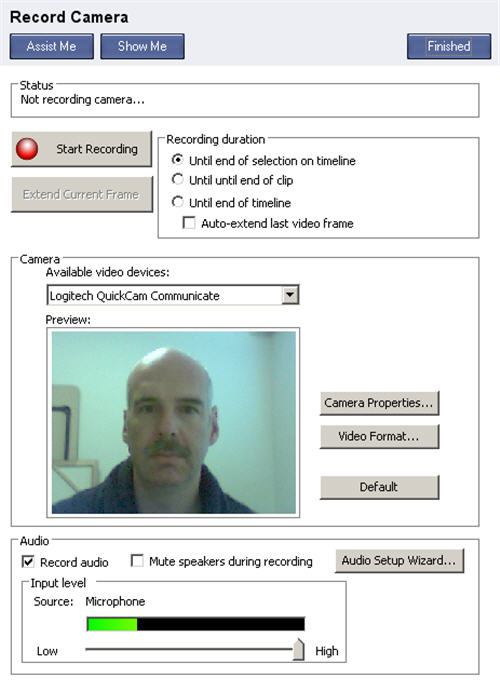
The entire left side of the interface disappears, to be replaced with the Record Camera frame. Let's look at some of the options available here. First off are the Assist Me and Show Me buttons. Clicking on the Assist Me button takes you to the Camtasia Studio Help file. Clicking on the Show Me button takes you to a video tutorial on the TechSmith Web site.
Let's look at the options. First off, under the Camera section, you can choose which video device you want to use from the popup.
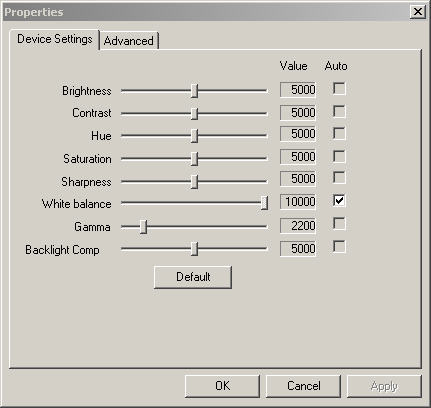
To the right of the image you're recording is the Camera Properties button. This brings up the Properties dialog box. As described in the last tutorial, this is where you can change settings such as brightness, white balance, etc. When you're satisfied with the settings, click on OK and you're returned to the Record Camera frame.

Clicking on the Video Format button gives you access to your video settings, such Output Size, Color Space, etc.

Below the Camera area is the Audio section. Here you can choose to record audio with your camera, choose the audio device, set the microphone input level and/or mute your speakers during the recording, If you're recording multiple tracks, muting the speakers is important so you don't hear them during the recording.
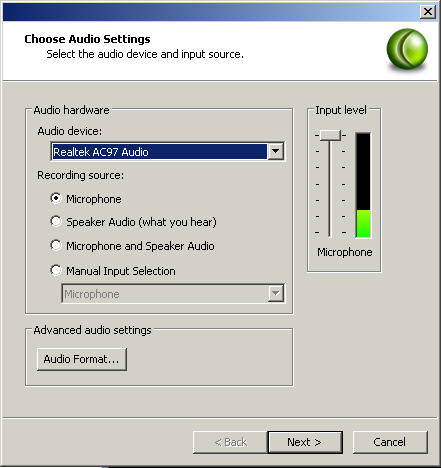
Clicking on the Audio Setup Wizard button gives you access to the Choose Audio Settings dialog box for additional options.

The next section to look at is the Recording Duration area. You can select to record until the end of a selection on the timeline, record until the end of a specific clip, or record until the end the timeline. You can also chose to auto-extend the last frame in case the camera recording lasts longer than the video in the timeline.
Once you have all the settings in place, you're ready to record your video. Press on the Start Recording button will begin the playback of your video and you're ready to begin the camera recording. When recording, if you realize that your video is too short or moving too fast, click on the Extend Current Frame button (below the Start Recording button). This pauses the playback, allowing you to finish your explanation. When you're ready to continue, click on the Resume Video Playback button (which replaced the Extend Current Frame button) and the clip length will be automatically adjusted. Tip: Hotkeys to turn the Extend Current Frame button on and off are "E" and "V," repectively.
Click the Finish button when you're ready to finish the recording. Once you do so, a dialog box comes up, prompting you to save your file in the WMV format.

If you recorded the camera on its own, you'll get a confirmation message like the one above, telling you that your recording has been saved in the Clip Bin.
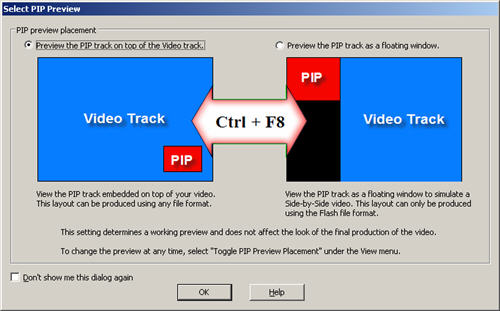
If you've recorded the video as part of a project, it will be saved to your project as a PIP clip and also be placed in the Clip Bin. If you have a project in the timeline and save the file, the Select PIP Preview dialog box appears. (This dialog box also appears when you import a video in your project, so I'll explain how it works in the Picture in Picture section, rather than here.)
[next]
Created: June 5, 2003
Revised: May 24, 2007
URL: https://webreference.com/video/column3/1


 Find a programming school near you