How to Create Inline Video in WordPress with Camtasia Studio | 2
How to Create Inline Video in WordPress with Camtasia Studio
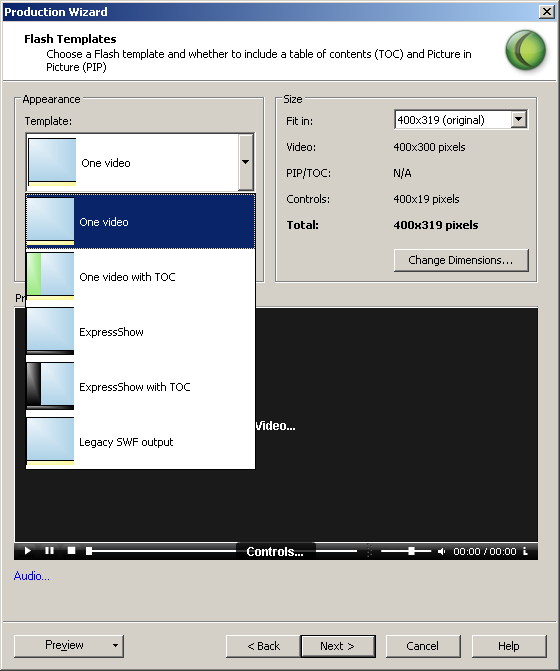
This brought me to the Flash Templates section. For the template, you have many choices, but I wanted everything included in one video, so this is the template I chose. Note that the video size is 400x319 pixels. We'll need that information to embed our video in WordPress (however the settings I've used below are slightly different).
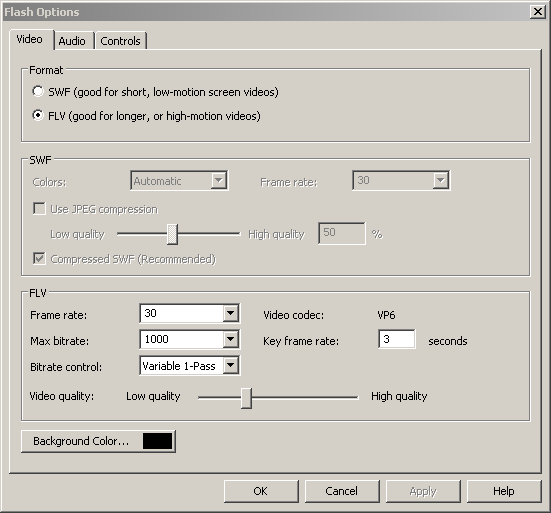
Immediately below the templates popup (which is obscured in the screen shot above this one) is the Flash Options button. I clicked on that and made sure to select the .FLV format for output. When you click on OK, you'll be returned to the Flash settings section. From here, I kept clicking on Next, to finish all the steps in the Production Wizard, accepting the default settings as I went, and then output the video.
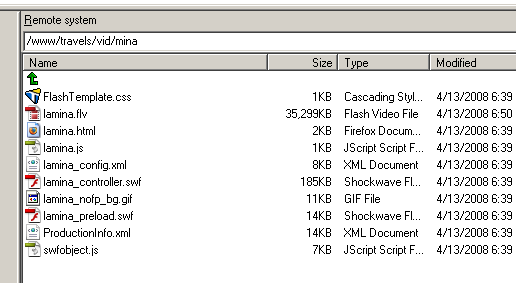
Once your video has been output, the next step is to upload the files to your FTP site. I use WS-FTP, but there are many other programs that will do the job. Above is a screen shot of the files I loaded.
The next step is to return to WordPress to write the post and click on the Kimli Flash Embed ( KFE) button to add the code in the WordPress editor. This brings up the following code, as seen earlier on in this tutorial.
[kml_flashembed movie="" height="" width="" /]
Note: While it's tempting to do your editing here, don't. I find that WordPress has a tendency to add additional code and it often strips out code that I'd very much like to have in my posts, forcing me to do some workarounds.
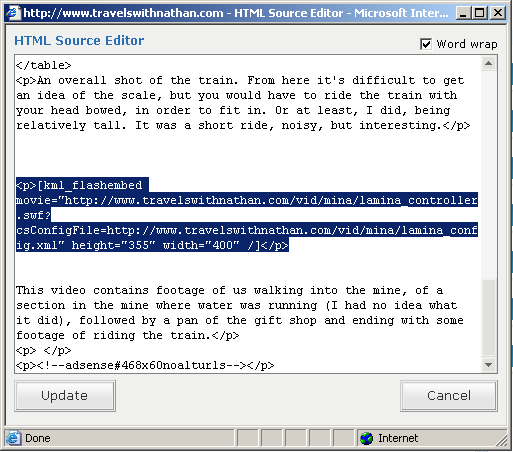
A way around that problem is to click on the HTML Source button in the toolbar and edit the code in the HTML Source Editor.
Based on what I had above, I thought I could enter in the following data for my site:
[kml_flashembed movie="https://www.travelswithnathan.com/vid/mina/lamina.flv" height="355" width="400" /
Unfortunately, it didn't work Not knowing what to do, I contacted TechSmith for support. After several exchanges, they came up with a piece of code that you need to use to make the Kimli plug-in work properly. Here it is:
https://www.travelswithnathan.com/vid/mina/lamina_controller.swf?csConfigFile=

https://www.travelswithnathan.com/vid/mina/lamina_config.xml
Here are the sections you'll need to change for your Web site.
Web site: https://www.travelswithnathan.com
Web directory: vid
File name: lamina
When you look at your file, you'll notice that it contains an extension, . FLV in this case. Note that the extension isn't included in the code snippet above.
Here's what the complete code snippet looks like in WordPress with the height and width information added:
[kml_flashembed movie="https://www.travelswithnathan.com/vid/mina/lamina_controller.swf?csConfigFile=

https://www.travelswithnathan.com/vid/mina/lamina_config.xml" height="355" width="400" /]
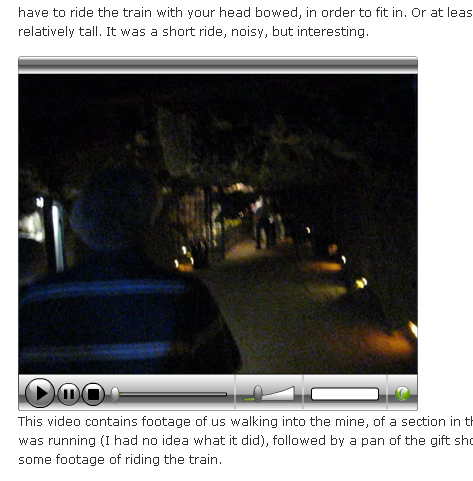
Here's what the finished video looks like in my blog.
Additional KFE Notes (from the ReadMe file)
Below is some more information about the attributes for the KFE plug-in. All attributes for the KFE tag should be lowercase and double quoted. These are:
MOVIE (required): The path and file name of the flash movie you want to display.
HEIGHT (required): The height of the flash movie, expressed in pixels or a percentage.
WIDTH (required): The width of the flash movie, expressed in pixels or a percentage.
Special thanks to Chad Wandler, Michael Spinks and the technical team at TechSmith.com. Without their help, this article could not have been written..
[previous]
Created: June 5, 2003
Revised: May 30, 2008
URL: https://webreference.com/video/column11/1


 Digg This
 Find a programming school near you