Building a Weblog | Page 3
[previous] [next]
Building a Weblog
Starting To Code
Start out by creating your project configuration file. This configuration file makes customization of the blog easy, for you or for other users who run it.
Create a new directory in htdocs on your computer. Inside this directory, create a new file called config.php (as shown in Example 4-1):
Example 4-1: Using a configuration file makes customization and personalization a piece of cake.Configuration Files for Distributed Applications
If you plan on writing a Web application that you intend to distribute so that others can download, install, and run it, easy configuration is essential. This is where a standard configuration file is useful. Settings that the user may want to tweak can be kept out of the main code.
Most of this file is simple configuration. The first four lines should look familiar to you; they are the normal database settings. You can change these to match your own database setup.
Below the database settings, another three variables are set. The first one ($config_blogname) sets the name of the blog. The second variable ($config_author) enables the user to set his name as the author. The final variable ($config_basedir) refers to the location of the blog, in URL form. This variable is particularly important and is used later in various parts of the code, specifically to redirect to different pages.
You may have noticed that three of the configuration variables begin with "config." This distinguishes these variables from other, non-configurationrelated variables in your code and is a great way to remember what a particular variable is associated with.
Designing a User Interface
In the previous chapter, you created a generic Web site and made use of a number of include() and require() functions to separate different parts of the site. This application uses the same concepts to provide a consistent look and feel.
The stylesheet.css File
This project uses the stylesheet.css file created in Appendix A. Copy the file to the current project directory to apply the stylesheet to the project.
Creating the Header File
Create a file called header.php and add the code shown in Example 4-2.
Example 4-2: This simple header file will be used across all pages.
There are a few important points to note about this code. Here, a PHP block is opened at the top to include the config.php code in the page. The require() function—as opposed to include()—has been used here, because config.php is essential to the correct behavior of this page. If config.php does not exist, the entire application breaks down during any database work.
Most of the HTML in this code should look fairly straightforward, but you might have also spotted a small chunk of PHP in the <title> tag. In the title, the contents of the $config_blogname variable from config.php is displayed (refer to Example 4-1); this adds the blog name for the blog in the title bar of the browser window. This variable's value is also repeated inside the first
<h1> tag. This provides some basic (very, very basic!) branding.
The final addition to the code is a link beneath the <h1> tag to the main page (index.php, which you'll create shortly). To keep this project simple, links to different parts of the site will appear in this header <div>. The last line of code opens the main <div> in similar fashion to the Web site created in Appendix A.
Creating the Footer File
With the yin of the header file complete, it is now time to create the yang of the footer file. Create a new file called footer.php that looks like Example 4-3.
Example 4-3: Like the header file, this footer will be shared across all pages.
The first line of the file ends the main <div> that was opened at the end of the header file (see Example 4-2 for the opening of this <div> tag). After this, you create a footer <div> to contain a copyright symbol (achieved with the special © markup) and then add a small PHP block to (again) display the contents of a variable from the config.php file. This gives the site suitable credit for whoever runs it.
You can test that your header and footer files work by creating a file called index.php and adding the code in Example 4-4.
Example 4-4: With a header and footer, actual site pages become very simple.
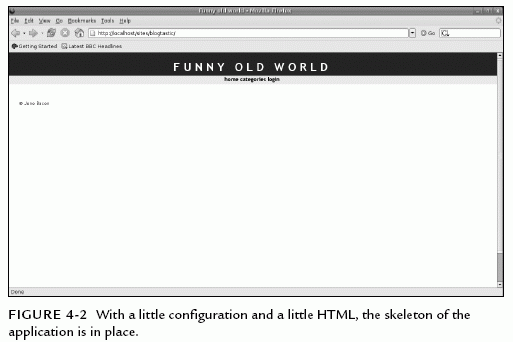
When you access the index.php page in your browser, you should see the simple design shown in Figure 4-2.

[previous] [next]
URL:


 Find a programming school near you