Creating a WSDL File and Clients for Your ASP.NET Web Service [con't]
Creating Clients for the Web Service
To use the Web service, you need to create a client. The client can be a Web application or desktop-based application. In this section, you will create both so you can see that it does not matter who enquires about a particular service, the Web service responds to any client. To start, let's create a Web-based client. Create a new project in Visual Studio and select ASP.NET application as shown in Figure 1.
Figure 1: Select ASP.NET Application from New Project in Visual Studio
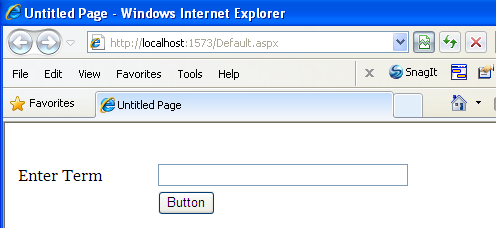
Add two labels, a text box and a button. Arrange them so your form looks like Figure 2.
Double click on the button and add the following code:
Then on the top of the form, add the following line to add a reference to the class that you created earlier:
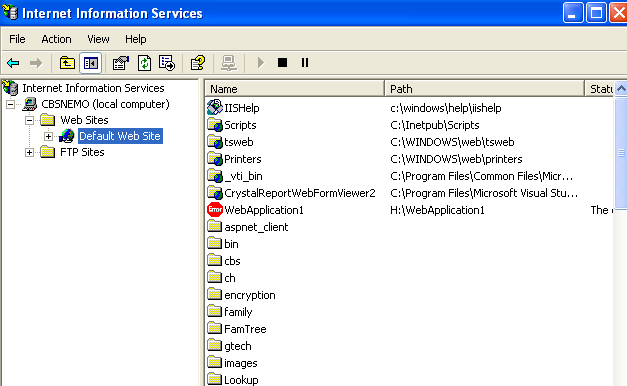
Now you need to mark the folder in which you saved the project as an IIS application. To do this, go to your control panel and click on Administrative Tools - > Information services. Then go to your default website (see Figure 3).
Figure 3: Your Default Website
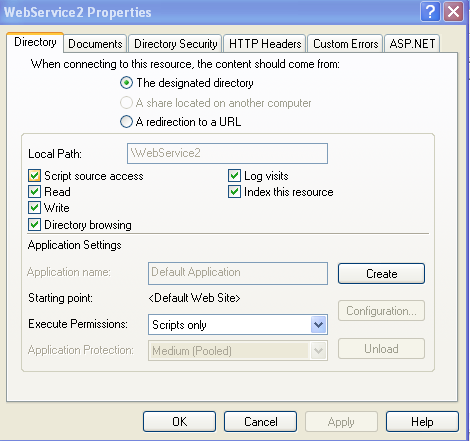
Scroll down to where the folder is and right click select properties. You should now see something like Figure 4.
Figure 4: The Properties of Your Project
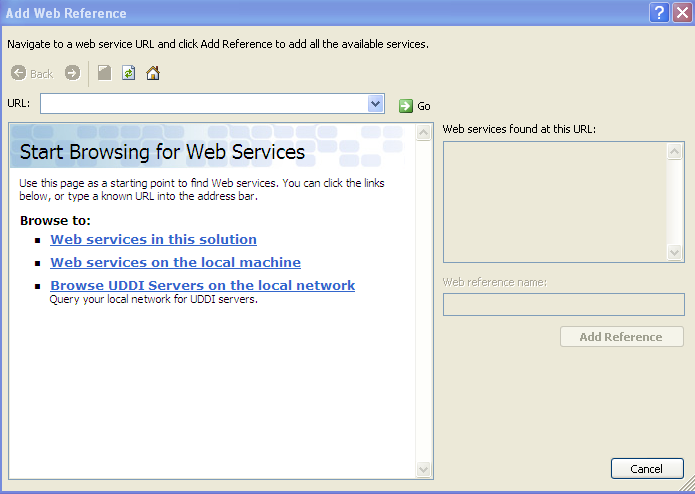
Click on create and then click ok. Now go back to the project and in the solution explorer, right click and select -> Add Service Reference. On the dialog that appears, click on advanced and then on the dialog that pops up, select Add Web Reference. You should see something like Figure 5.
Figure 5: Your New Web Reference
Now, select Services on local Machine. That should bring up a list of all the services on your machine. Select the name-lookup service and then click on Add Reference. You should now be able to run the service. I get the result in Figure 6 when I run mine.
Figure 6: Result When I Run My Service
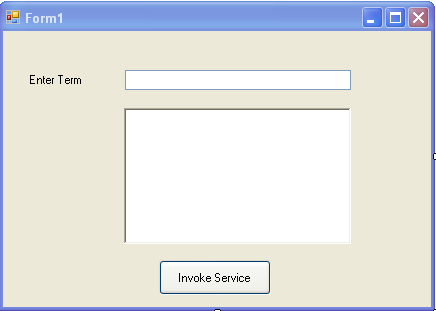
Now, let's create a desktop version of a client for the service. Create a new project. This time select the windows form application. Create a form and add a textbox, button and richtextbox. Arrange them so they look like Figure 7.
Figure 7: A Form with Textbox, Button and Richtextbox
Now as with the Web application, go through the process of adding a service reference. When you have completed that process, click on the button and add the following code:
Now run the application. You should get a result similar to Figure 8.
Figure 8: Result When You Run Your Service
Conclusion
The three articles I have written will hopefully give you some insight into how Web services work and inspire you on to take Web services to the next level.
- Anatomy of a Web Service: XML, SOAP and WSDL for Platform-independent Data Exchange
- Create Your First ASP.NET Web Service
- Creating a WSDL File and Clients for Your ASP.NET Web Service
Happy coding!
Original: July 6, 2010
 Find a programming school near you
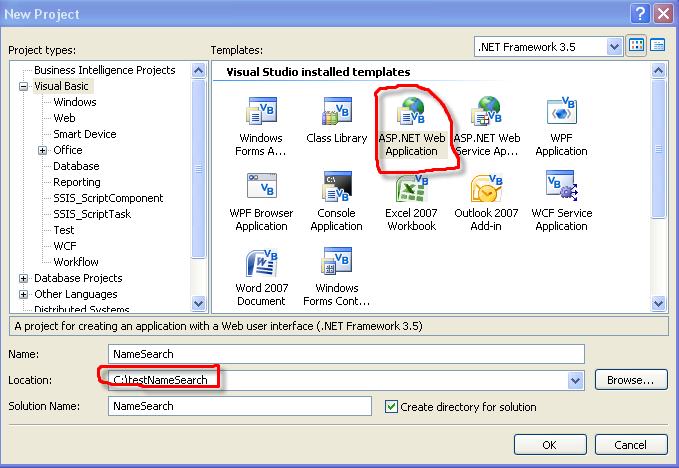