Look Ma ... No Pixels pg 5: Production Graphics with Wendy Peck at webreference.com
 |
Look Ma ... No Pixels: Selections, Exporting and Importing | |
|
OK, we have unraveled the mysteries of paths, but what can we do with them? I have already talked about saving your paths with your document, and sharing with other documents a most valuable use. For very few bytes, you can save paths for future use. I have said all along that paths were really only selections. And that, for the most part, is what they are. In fact, you can easily transform any path into a selection, and and selection into a path. |
||
 |
Creating Selections from Paths Simply activate the path you wish to turn into a selection. Right click on the Paths palette listing or the path on the canvas, or use the side menu on the Paths palette to open the Paths menu. Select Make Selection. That's it. You now have a selection. |
|
|
|
Creating Paths from Selections Once you have worked with bezier curves, and have mastered the general idea of how to create and edit the curve segments, you will never return to struggling with difficult selections. You will often find that you will convert paths to selections once the basic shape is in place, but you will have saved much time and aggravation by using the right tools to create your basic shape. |
|
|
|
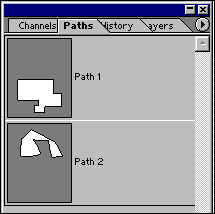
Exporting Paths to Illustrator The process is very simple, but the export action will pick up any path that you have in the Photoshop document. Of course, since they are exported as vector objects, Illustrator considers each path to be a separate object. I have illustrated the paths in a Photoshop document (large thumbnail view in the Paths palette) and the resulting objects in Illustrator. The paths come into Illustrator with no stroke or fill, but that is easily added to the vector program. This exporting function is very valuable, especially now that Photoshop text remains as vector until the layer is rasterized. The Web to print implications are quite exciting, since any path that is exported as a vector becomes completely resolution independent. To export paths, simply select File > Export paths to Illustrator. You will be asked to assign a name to the file, and that is it. Open Illustrator, and open the file.
|
|
|
|
Importing Illustrator Files You can also use the superior vector tools in an illustration program, and create simple objects to import into Photoshop. You can then make a selection from the imported art, create a path, edit it, and if desired, export to Illustrator again. Give it a try. Simply save your Illustrator file and select File > Place in Photoshop. The object will come in with a cross through it for placement. Place it where you desire, double click on the object and the object becomes a layer in Photoshop. Get comfortable with paths in Photoshop. It is well worth it. Next time we look at Photoshop and paths, we will focus on the Shapes tool and tie all that you have learned here into working with vector layers in Photoshop. Paths will feel funny for a while, but with the instructions you have here and a little homework, you will soon be dragging control handles as if you were born to it. Have fun! |
|
|
|
Look Ma ... No Pixels: Tutorial IndexPaths in Raster Programs |
URL: https://www.webreference.com/graphics/column45/
Created: April 2, 2001
Revised: April 2, 2001


 Find a programming school near you