Software Review: Quask FormArtist Professional
[next] |
Software Review: Quask FormArtist Professional
By Nathan Segal. February 13, 2004.
If you do a lot of web design work, chances are that you’ve had to design forms, which can be a time consuming task. If you’ve been looking for an easier way of getting the job done, check out Quask FormArtist.
With FormArtist, the main thing is getting up and running quickly. Once you’ve set up the mail server addresses and tested the gateway, you’re ready to create forms. To begin, you can click on the Design button (if the Start Wizard is active) or click on File: New. In the Design dialog box, your options are Blank Form, Using a Style, Using a Ready-Made Form or Open Existing, where you can open an existing form for editing.
To create a page from scratch, click on New and in the Design dialog box, click on New Blank Form. From there, the next step is to click on Edit: Form Properties. Here you can set options such as Skin, Form Size, Grids and Snap-to options, etc. One option that is curiously absent is the use of rulers, though you can turn on the Show Grid option for accurate placement.
In the form, you can add pictures or objects from the Library. Examples of these are buttons, design elements and photographs. Another interesting feature is the Emoticon, which provides a way of allowing the respondent to express how they feel about something in a graphical fashion by moving a graphical slider in your form. To access the different choices, add an emoticon to your page, then right-click on the Emoticon. Choose Properties (from the popup menu) to edit it. A good example of the emoticon in actual use is on the top right of the Quask home page, under the heading “Try it Yourself.”
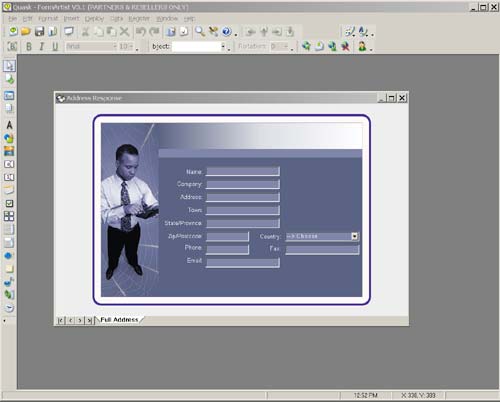
For our test, we chose the Style option, selected a background, then an address response page, and clicked on OK, which brought us back to the main window. Next we edited the fonts and deleted some data.
With the form complete, we pressed on F5 to deploy the form, selected the form from the Deploy Form dialog box, chose the profile of the Quask Test Server to test out the form and followed the steps in the Deploy Form dialog box.
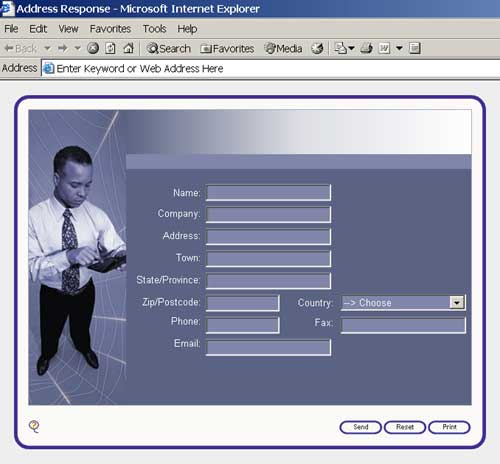
The deployed form using Internet Explorer.
To properly set up FormArtist on your server, you need to create a Deployment Profile, which is where I ran into problems and had to call Technical Support. Here’s some information on how to avoid these problems.

On the main menu, click on Deploy: Deployment Profiles. This brings up the
Deployment Profiles dialog box. Click on the Add New Profile button. This brings
up the Deployment Profile Editor.
[next] |
Created: June 5, 2003
Revised: February 13, 2004
URL: https://webreference.com/authoring/design/formartist/1
 Find a programming school near you