3D Animation Workshop: Lesson 104: Finishing the Character
|
|
Lesson 104 - Finishing the Character - Part 1
This time, we'll wrap up our series on character modeling and animation in 3D Studio MAX, begun more than four months ago in lesson 96. If you haven't been following, you may want to look over at least the last few lessons on modeling with subdivision surfaces.
In the previous lesson, we built the basic branched structure for a biped figure. Once you have this fundamental architecture, it's all a matter of adding new rows and columns of vertices. I'm not going to distract you with a lot of words. I've constructed a generic adult male character form that embodies (get it??) some fundamental principles that I live by.
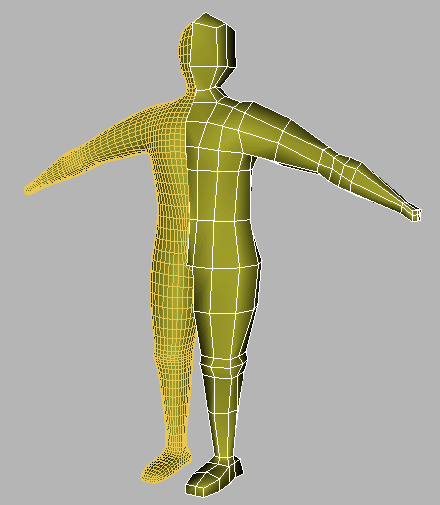
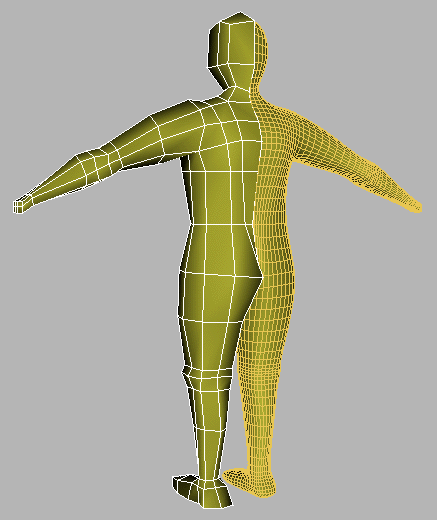
Here is the model at a stage in which the basic proportions have been established with the minimum amount of geometry. You can't worry about even rough details at this point because you don't have enough geometry to support them. The primary rule of all creative work, in my opinion, is to proceed from the general to the particular. This is actually quite hard to do. You need to find techniques that allow you to pursue continuous levels of refinement without having to undo what you've already done or finding yourself into a corner that's too difficult to back out of.


I originally set up the model as in the previous lesson, with a wireframe cage surrounding the subdivision surface in the classic manner. But I discovered that I liked this method more  in which the subdivision surface was a single mirrored reference. It's much easier to select edges and vertices on the cage this way, and the relationship between the two states is clear. I learn new techniques every time I model.
| To Continue to Parts 2 and 3, Use Arrow Buttons |
|
Created: October 23, 2000
Revised: October 23, 2000
URL: https://webreference.com/3d/lesson104/


 Find a programming school near you