A Real-World Project
A Real-World Project
By Nathan Segal.In this month’s column, I’m going to show you how I used Poser, 3D Studio Max 5 and Photoshop 7 to create images for a an Art exhibition titled: “The Dark Night…” It began with obtaining a review copy of Poser 5. When I installed it, it crashed my computer the first time I tried to run it (a Pentium 4, 2.1MHz with 512MB of RAM). A reinstall fixed the problem but when I tried to use it recently, it crashed my computer every time I tried to use it. The only solution was to use the Service Release 3 patch downloaded from the Curious Labs web site. After that, the program opened, but I remained suspicious of it for awhile, though it now seemed stable.
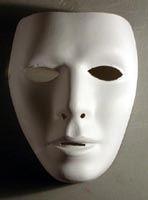
Still, I wanted to use Poser in the way the name implies, for posing figures. I needed a face and neck for a series titled: “The Faces of Denial.” In the early planning stages of the project, I obtained a white mask, but I wasn’t satisfied with the look of the mask, nor was I confident that it would work with textures I had in mind, so I turned to 3D and Poser was the perfect starting point.
Upon working with Poser, I looked at the Face Sculpting tools and experimented with adjusting the features using the Ethnicity controls, but I quickly realized that the default face gave me the overall blank look I was after. Using the cameras, I zoomed in on the default male figure, then using the Lipsync Morphs, I adjusted the mouth position so it resembled the Venetian mask above. Once I had that, I was ready for the next step, which was to export the image into 3D Studio Max.

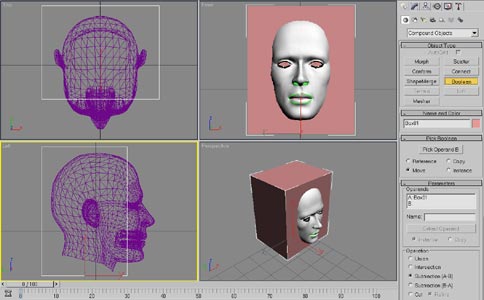
To do that, I returned to the Pose tab, then selected File>Export>3D Studio. In the Export Frames dialog, I selected a single frame for export and clicked on OK. This brought up the Heirarchy Selection dialog box, which allows you to select which parts of the body that you want to export. In this case, I wanted the head and neck so I deselected the other parts of the body, then exported the head and neck.

Next, I opened 3D Studio Max (version 5), imported the 3DS file and began to edit the face. The first thing I wanted to do was to remove portions of the mesh so only the face remained, similar to the Venetian mask. To accomplish this task, I created a couple of different box objects and used a Boolean operation to delete parts of the head.
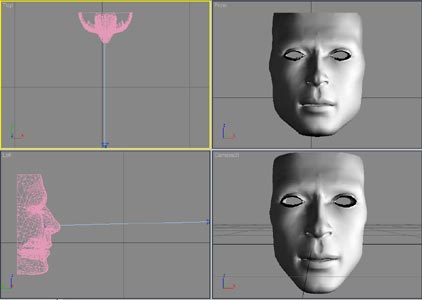
The figure below shows the edited mesh. Note that there were portions of the mouth and eyes still remaining, but those were easy enough to retouch in Photoshop, so I left them alone for the time being.
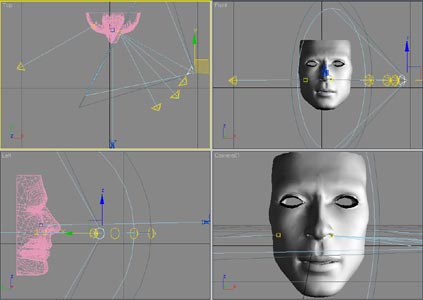
The next step was to light the face and to make it appear to be as realistic as possible. For the material, I used a default gray color with no texture. Next, I created several white spotlights, all in slightly different positions, but with four of the spotlight targets focused on the same location on the right hand side of the face and one spotlight on the left, to control the amount of shadow detail. With all lights, I initially used an intensity of only 20% . The lower setting allowed me to see what effect the lights had on the mask surface. From there, I could move them around as necessary, change the size of the hotspot and falloff and experiment with the intensity. Looking at the lights from right to left, I set the intensity to 80, 80, 80, 20 and 40, respectively.
Created: June 5, 2003
Revised: December 12, 2003
URL: https://webreference.com/3d/column7
 Find a programming school near you