Create a 3D Scene with Maya and Photoshop. Pt. 1
Create a 3D Scene with Maya and Photoshop. Pt. 1
By Nathan Segal
Alias Software’s Maya is well known as a cutting edge 3D application. Early in March of 2003, Alias Software won an Oscar for Scientific and Technical Achievement for the development of Maya. Among its many credits, Maya was used to create visual effects in several Oscar winning and nominated movies, including The Lord of the Rings: The Two Towers, Spider-Man, and Star Wars Episode II: Attack of the Clones. According to one of my sources, Maya is used for up to half of the available 3D work opportunities.
In Maya, there are many different ways to create a scene thanks to an overflowing toolbox of options. But even the most durable of 3D applications can benefit from the use of Photoshop, which can be used to build scene components, create textures, retouch existing backgrounds etc. Here, you’ll learn how to create a flying saucer in Maya, a Nebula in Photoshop and bring the two together in Maya to complete the image.
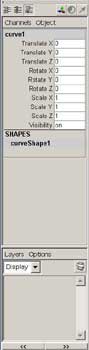
So let’s get started.Your first task will be to create a NURBS Flying Saucer. First, start up Maya and on the default screen, select Modeling from the drop down menu selector at the upper left of your screen. Next, make sure the Perspective View is selected and tap the spacebar, which lets you see multiple views of a scene. Click on the Front view and tap on the spacebar again to make the Front view fill the screen. If the Channel Box is not active, go to the top right of your screen and click on the third icon (the channel box is displayed on the right of the front screen). Now, you’ll use the CV curve tool to create half of the outline of a flying saucer. Choose Create> CV Curve Tool and begin clicking with your mouse to define a path similar to the one below.
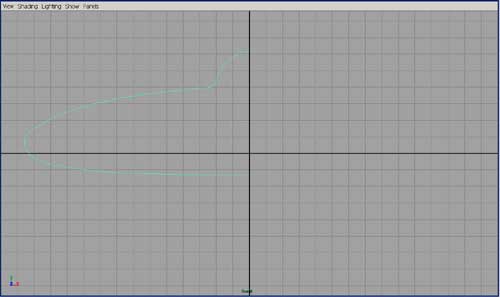
When you begin clicking with your mouse, the shape will appear as a polygon, until you reach four clicks, at which time you’ll see a curve. To define sharp corners, click in the same location three times. As you move around the shape, the points you’ve clicked become the control points for defining the curve. It takes some practice to know where the curve will be positioned using the CV Curve Tool. Once you’ve defined the curve, press Enter to complete it. Now, you’re ready to move onto the next step, which is creating the Revolve Surface. Before you do so, deselect the curve and tap on the spacebar to return to multiple views.
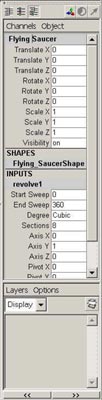
Make sure the Saucer curve is selected (it turns green). From there, you’ll create the Revolve Surface. In the top menu, click on Surfaces>Revolve. The profile revolves around a central axis, creating a flying saucer shape. In the parameters menu on the top far right of your screen, name this shape “Flying Saucer.” Press keys 1, 2 and 3 to see various degrees of display smoothness. This is setting number 3. Under Inputs in the Channel Box on the far right of your screen, set Sections to 32.
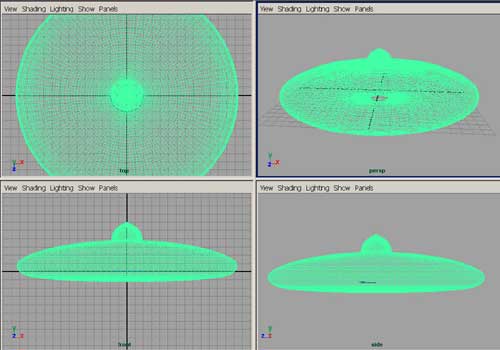
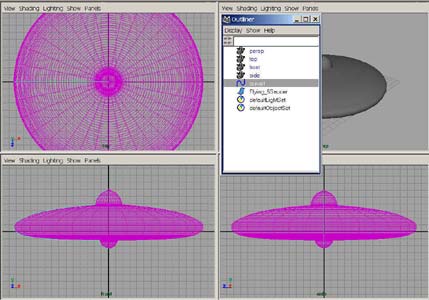
Make sure your cursor in Perspective View and press 5 on your keyboard for Shading>Smooth Shade All, which displays the Flying Saucer as a shaded surface. Alternately, you can enable this setting by clicking on Shading>Smooth Shade All in the Perspective View.

If you’re not satisfied with the shape of your saucer at this point, you can edit the Revolve Surface. Click on Window>Outliner. The Outliner dialog appears. When you click on curve1 in the list, the saucer turns a magenta color and you can see curve1 in green.
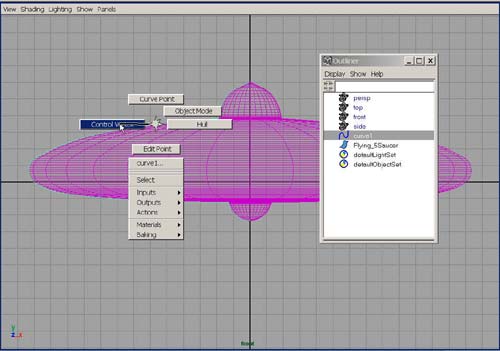
In the Front view, right-click on the curve and select Control Vertex from the marking menu (the control vertex points are highlighted in purple). Select and move one or more control points to adjust the curve shape, which affects the entire object.
Created: June 5, 2003
Revised: August 28, 2004
URL: https://webreference.com/3d/column16/1
 Find a programming school near you