Building a Weblog: Part 3/Page 2
[previous] [next]
Building a Weblog: Part 3
Don't Just Let Anyone Log In
Everything created so far in this project has been designed to be accessible by anyone who stumbles across the blog. As such, these pages have no built-in security— that is, the pages are not restricted to certain users. Because of the open nature and accessibility of the site, it is recommended that only information suitable for public consumption is present on these pages. You should avoid adding your credit card number, personal information, or those embarrassing photos of you at a fancy dress party. (That is how rumors get started.)
Allowing restricted access for the owner to add and remove content is an essential feature, however. Having to log into phpMyAdmin to add content is not an ideal solution, so the master plan is to create pages to provide a convenient means of adding content. You need to provide a way for someone to log in, and the login details the user enters should match the ones in the logins table. You will use PHP sessions (covered in Chapter 2) to track the user by sharing variables across different pages. If the user successfully logs in, you can set a session variable and then check to ensure that session variable exists on the restricted pages.
To begin, create a new file called login.php and add the login form:
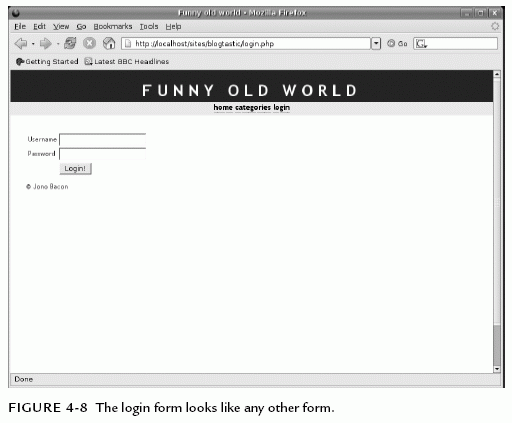
This form contains some familiar-looking text boxes (see Figure 4-8).
You may have noticed that the second <input> tag uses password as the type. When you use this type of form element, the contents are disguised as stars or dots to hide the password from nosey onlookers.
The next step is to process the form and check if the database contains the login details. Before you do this, however, add the usual introductory code at the start of the file (before any HTML):

Forms Feel Insecure, Too
Although forms provide a means for people to securely identify themselves, the passwords transmitted to the server for processing are sent as plain text. This is a potential security risk inherent when using forms. The only solution to this risk is to encrypt form data with JavaScript when the form button is clicked, a technique beyond this project's scope.
Add the code that checks if the Submit button has been clicked (again, from the form you've already added):
The SQL statement is created to check if the username in the logins table is equal to the username box in the form and if the password field is equal to the password box in the form. The query is then run, and the rows are counted. The number of lines returned from the query indicates whether the details typed were correct. If the details are correct, a single row is returned—no more, no less. If no rows are returned, the details do not match.
Add the following code:
In the case where the login details are valid, a new session is created.
When using PHP sessions, you must register your session variables. The session_register() lines create two variables, called USERNAME and USERID.
Be Consistant When Naming Variables
Naming session variables in uppercase is not mandatory, but it's useful because this helps them to stand out in your code as different types of variables.
The next two lines then use _SESSION (representing the user's session information) to use the variables and store information from the SQL query (the username and the id) in them. The final line performs a header redirect to index.php.
If the Submit button has not been clicked, a small chunk of code is run before the form displays:
Include the header.php file and then check to see if there is a GET variable called error. If there is, the error message is displayed to indicate that the user typed an invalid username or password.
At the bottom of the page, after the HTML, add the final bits of code:
[previous] [next]
URL:


 Find a programming school near you