How to Create an Ajax Autocomplete Text Field [con't]
Installing the Tools
The Java Development Kit
To install the JDK on your computer, run the self-extracting executable and unzip the files to wherever you'd like Java to reside.
If you wish, you can add the JDK executables (javac.exe, java.exe, javadoc.exe, etc.) to the PATH variable so that you can run them from a DOS prompt without having to type the full path of the command:
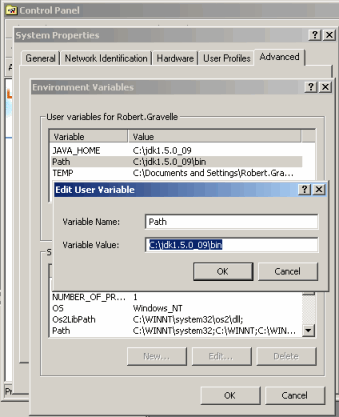
Modifying the Path variable
The full deployment instructions are on the Sun site.
The Tomcat Server
The Tomcat server files have to be unzipped using a program because they aren't self-extracting. I recommend Winzip on Windows. For Linux or BeOS, gzip should already be on your system. To extract tar.Z files on Unix systems, type the following:
zcat file.tar.Z | tar xvf -
Locate the jstl-1.2.jar file that we downloaded earlier and place it in the Tomcat lib directory. In version 6 it's under apache-tomcat-6.0.14\lib. In version five, it's under \apache-tomcat-5.5.25\common\lib.
Setting Up and Configuring Eclipse
In the case of the all-in-one installation, use a program like WinZip to extract the files to the directory of your choice, just as you did with the Tomcat server. To extract the plug-ins to a pre-existing installation of Eclipse, be sure to select the directory which contains the eclipse parent folder and not the plug-ins folder itself. Doing so will result in another "eclipse" folder being created underneath the existing one. If you examine the contents of the emf-sdo-xsd-SDK-2.3.1 archive, you'll see that the top level files reside in the eclipse folder. The plug-ins will be placed in the plug-ins subfolder.
Once you've extracted all the necessary files, you're ready to fire up Eclipse and do a little preliminary house cleaning. Specifically, you need to tell it where to find your Java installation and Tomcat server.
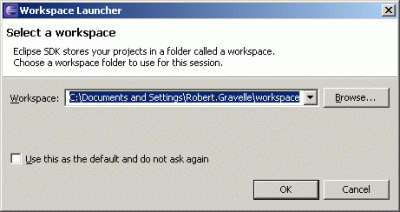
Workspace Launcher dialog
The first time you launch Eclipse, you'll be greeted by the following dialog to set the location for the Workspace folder. Under the root folder is where your projects will reside. Put it in a location that's best for you. You can always change it later. Unless you have a reason to switch among several different workspaces, I recommend that you check the "Use this as the default and do not ask again" checkbox. By doing so, Eclipse will always open that workspace automatically with all your projects in the "Project Explorer" pane:
Eclipse offers a whole slew of Java attributes that you can define, but we're only interested in one: the "Installed JREs." The Preferences dialog is accessible via Windows => Preferences... on the menu. Once there, click on the "Java" branch in the tree on the left-hand side to expand that item. Next, select the "Installed JREs" branch. At that point you should see something like the figure below:
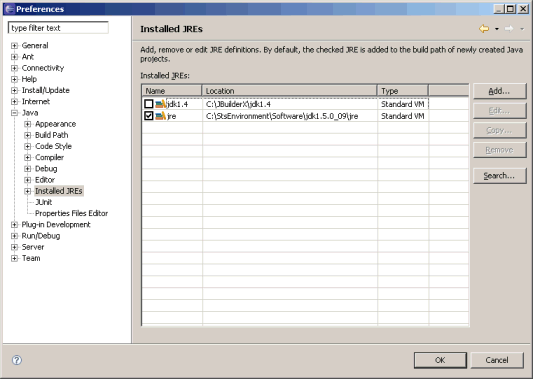
Installed JREs dialog
There are two ways to add your Java installation if it doesn't appear in the list: The first is to use the "Add..." button and click on the "Browse" button on the "Add JRE" dialog to select the home directory of your JDK installation. Once you've closed the "Browse For Folder" dialog, Eclipse will fill in the other fields, after a few seconds:
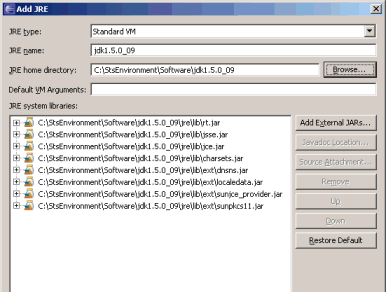
Add JRE dialog
Alternatively, you can select your JDK installation directory via the "Search..." button. Presumably, this would be used to find your installation if you weren't sure where it was. After you hit the OK button, a search progress button will pop up until it either finds a JRE or fails. I found that selecting your installation directory works equally well to the approach described above.
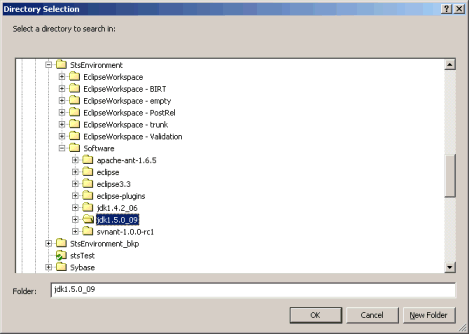
Directory Selection dialog
Once your installation has been located, be sure to select it by clicking on the checkbox on the left on the Preferences dialog if you have more than one version of Java running. You'll want at least version 1.5 Java.
Don't close the Preferences dialog just yet! Now it's time to configure the Server.
Expand the "Server" branch and select "Installed Runtimes" to display the list of available servers:
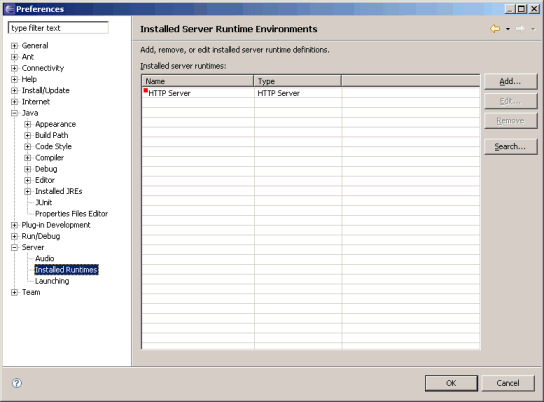
Preferences dialog
Again, you have the option of using the "Add..." or "Search..." buttons. Hitting the "Add..." button will bring up the "New Server Runtime" dialog:
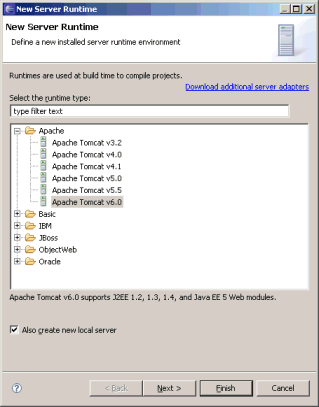
New Server Runtime dialog - Adding Tomcat
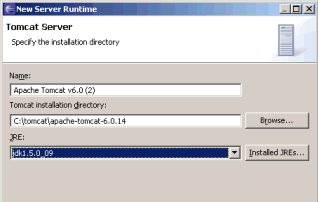
New Server Runtime dialog - Tomcat configuration
It contains a list of server runtimes to choose from. To add a new one click "Add...". A wizard will pop up and display a list of server runtimes supported by the WTP. Choose your version of Tomcat from the list. Go ahead and check the "Also create new server instance" checkbox because we'll need a server instance to deploy to later.
After you click "Next", you have to choose the JDK that the server should run under and the folder where you have installed your server:
You're now ready to build the Web application that will contain the Autocomplete text field!


 Find a programming school near you