Use JavaScript to Create a Scrolling Grid
Use JavaScript to Create a Scrolling Grid
A problem often encountered in web design is condensing large tables of data into a standard 800x600 web page. If the table is too big, the user will need to scroll the browser window to see all of the data, which means that the surrounding text and any row or header columns cannot be seen.
If the table is either very wide or very tall, this problem can be easily averted by a crafty use of the overflow style as in the example belowÂ

Fig 1. An example of Vertical or Horizontal scrolling using the overflow style
For tables that are both wide and tall, this technique won't work, as it's not possible to synchronize all of the scrollbars. Here, we need to use a different technique. In this article I show how JavaScript can be used to implement a grid with vertical and horizontal scroll bars so that any size of table data may be rendered in a small grid.
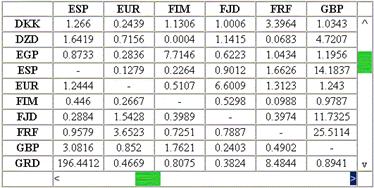
Fig 2. The scrolling grid. NB: The values in this table bear no relation to any currency, real or imaginary.
The scrolling grid is managed by a single JavaScript class called "Grid". The constructor function of the Grid class will render the HTML grid like the one shown above but first it must perform a few initialization stepsÂ
First, the two arguments of the Grid constructor are stored for later use. The name argument is a unique name used for storing the Grid object as a property of the window object. The data argument contains information needed by the Grid including row and column headers, cell size, and moreÂ
function Grid(name, data){
  this.name = name;
  this.data = data;
  var cursor = document.all ? "hand" : "pointer";
  window[name] = this;
  this.xOffset = 0;
  this.yOffset = 0;
Now the rendering process begins. Rather than calling document.write() multiple times (which can be slow), I've stored the HTML text in an array which will be combined into one string at the end of the rendering. First, a <table> element is added with an id that matches the name of the Grid objectÂ
  // render the grid  var aStr = new Array();
  aStr.push('<table border=1 cellpadding=0 cellspacing=0 id="' + name + '">');
The first row contains the column headers. Note that each column header is placed inside a <span> element inside a <th>. The reason for this will become apparent when using the init method.
  aStr.push('<tr>');  aStr.push('<td> </td>');
  for ( var j = 0; j < data.nCol; j++ )
  {
     aStr.push('<th width=' + data.nCellWidth + '><span>' +
        data.colHeaders[j] + '</span></th>');
  }
  aStr.push('<td width=20> </td>');
  aStr.push('</tr>');
For each data row, a row header is included at the front. Note: Here, each row header and data value is contained within a <span> element. On the span elements for the value cells, the overflow:hidden style is used to ensure the cells are all the same size. If any cell is allowed to expand, it will cause problems with the scroll bar rendering.
  // data rows  for ( var i = 0; i < data.nRow; i++ )
  {
     aStr.push('<tr>');      // row header
     aStr.push('<th valign=top width=' + data.nCellWidth + '><span>' +
        data.rowHeaders[i] + '</span></th>');
     //
value cells
     for (
j = 0; j < data.nCol; j++ )
        aStr.push('<td><span
style="overflow:hidden;width:' +
           data.nCellWidth
+ 'px;height:' + data.nCellHeight + 'px; ' +
           'text-align:center;">'
+ data.values[i][j] + '</span></td>');
The vertical scrollbar is added by including a <td> element at the end of the first row with colspan equal to the number of rows in the grid. There are two parts to the scrollbar; the first part is a scroll indicator, which shows which section of the source data is being viewed and the second part contains the control buttons used to modify the scroll position. In this example I have used the characters Â^' and Âv' for up and down and Â<' and Â>' for left and right.
These two parts are overlaid, one on top of the other using the position:absolute style. The button part is above the indicator so the Âbuttons' may be clicked.
Created: March 27, 2003
Revised: March 17, 2004
URL: https://webreference.com/programming/javascript/gr/column4/1
 Find a programming school near you