In addition to offering a multitude of extendable widgets, Dojo makes it quite easy to create your own reusable controls. Like standard Dojo widgets, you can create these controls declaratively or programmatically. The latter option, while more technical in nature, allows for more creative control over your widgets. For instance, you could insert your widget into the page in response to a user action or periodically refresh the values in real-time content using a Web service.
In this article, I rewrite the StockWidget that I created declaratively in the Using the Dojo Framework to Build Custom HTML Widgets article, using programmatic creation. The Web page will allow the client to view stock data for several commodities using a dropdown listbox. (You can download the StockWidget source files now.)
Some Prerequisites
I'm going to assume that you're familiar with setting up the folder structure,
importing the Dojo scripts, and initializing the djConfig variable. If not,
you can revisit the
Developing Custom HTML Widgets using Dojo
article.
The Widget Template File
dojoAttachPoint.
You should always use dojoAttachPoints to refer to a widget's DOM
nodes because you can't rely on dojo.byId() once the control's been converted
into a widget. The dojo.byId() may fail for a couple of reasons.
The main one is that the DOM structure of the converted widget
can be vastly different from the original control's. When converted by the Dojo
parser, the node that contains the property you want is likely not the same
one as the template code would suggest!
Here is the markup for the StockInfo.html file:
Widget Declaration
Dojo's dojo.declare() method defines your class. It is very strongly
based on Java's Class system, and includes such OO constructs as prototypal
inheritance, classical inheritance, and private members.
Here is the declaration code for the StockInfo widget that we'll use to start with. We will add to it as we include additional functionality:
Instanciating the Widget
We still need to include a container tag for our widget in the Web page,
but we must remove the dojotype attribute so that our widget is not instanciated
by the Dojo parser when the page is first loaded:
The main reason for handling the widget instanciation ourselves is the extra control that it affords us over automatic widget creation, such as that of control instanciation ordering, parameter data types, as well as parameter initialization and formatting. The following code calls the widget constructor immediately after the rest of the page has finished loading and all the other controls have been made into widgets:
If we bring up the page in a browser, we can confirm that our widget appears just as it did using declarative creation:
Creating Widgets at Run-time
One of the best features of programmatic widget creation is the ability to create widgets at any time. To illustrate, let's add a StockWidget creation button. Sticking with the programmatic creation style will keep our code more consistent:
To make it work, all we have to do is move the StockWidget constructor call
into the button's onClick() event. You'll need to add a button control to the
page as well:
Setting the Widget's Properties
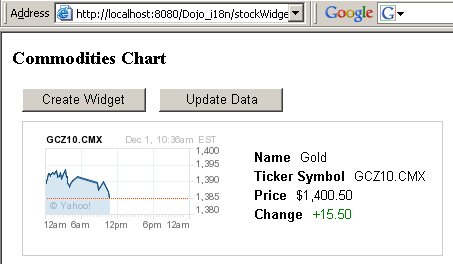
Creating a widget programmatically offers a couple of distinct advantages in terms of property handling. This is due in part to the fact that the widget constructor returns it to us as a JavaScript object, so that it can be stored in a variable. We can use it to reference the widget's properties at a later time, as demonstrated in the following code, which creates a second button to update the StockWidget's properties:
Here is the StockWidget with the updated data:
 Find a programming school near you
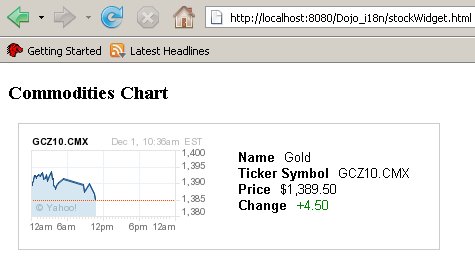