July 24, 2002 - Creating Web Service Proxy Namespace
 |
July 24, 2002 Creating Web Service Proxy Namespace Tips: July 2002
Yehuda Shiran, Ph.D.
|
wsdl.exe. Your .NET Framework should support this executable by including its directory in your path. Let's demonstrate this step with the add Web service. Open a Command Prompt window and cd (change directory) to d:\aspDemo. Type wsdl and verify you get the help for this executable. Type the full command now (in one line):
wsdl /l:js /namespace:calcService /out:calcProxy.js
https://localhost/Column113/simpleCalc.asmxwsdl command:
https://localhost/Column113/simpleCalc.asmx
/l: specified the language of the input file. Put js for JScript.
/namespace: specifies to which namespace you want to add your new simpleCalc class. The .NET framework will create a new namespace if it does not find one in its archive. The .NET framework stores the class definition somewhere on a system directory and you don't have to worry about it ever.
/out: specifies the name of the JScript file that will be created. This file is the proxy for the Web service. Put calcProxy.js, for example. This switch specifies where the proxy will be saved. If you don't specify a directory before the file name, the proxy will be saved in your current directory (d:\aspDemo in our case).
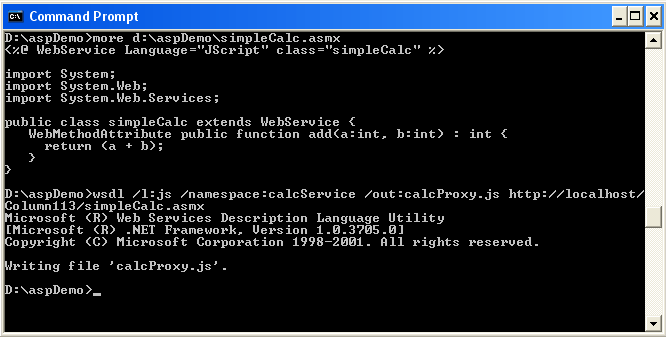
The following Command Prompt window shows the content of simpleCalc.asmx and the echo of the wsdl command:


 Find a programming school near you