Back in December, I wrote a news article about the latest release of a social networking site based on the Yelp.com model. It was called YelpClone then, but after legal finessing, the developer of the software, YourSite, did changed the name to MeeClones and then to Meeplace, added some new features, and improved the admin interface along the way.
Meeplace is a business review script and CMS (content management system) that you can install to turn your site into a professional review site, similar to sites like Yelp. This $350 software enables your visitors to submit their own reviews on businesses, cars, movies or whatever you have listed on your site. This review and installation guide walks you through the steps involved to get it running on your site, explains how to set it up, and discusses the features it offers.
Meeplace Installation
The installation of Meeplace is very similar to the installation of most CMS solutions. Initially, you have to create a MySQL database, which is usually done through your site's CPanel. It's a point-and-click process that takes only a couple of minutes, and when the database is set up, you will receive the information you need to install Meeplace, including:
- Database name
- Host name
- Port (usually 3306)
- User name
- Database password
When you have satisfied the requirements, you will be asked to provide the Meeplace license number and your domain name. Next, you will fill out the basic info, including the web site name, home page title, admin username and password, and the Google Maps API key. While it is not required, if you wish to take advantage of the mapping capabilities of Meeplace (and you do), you should sign up and get your own API key.
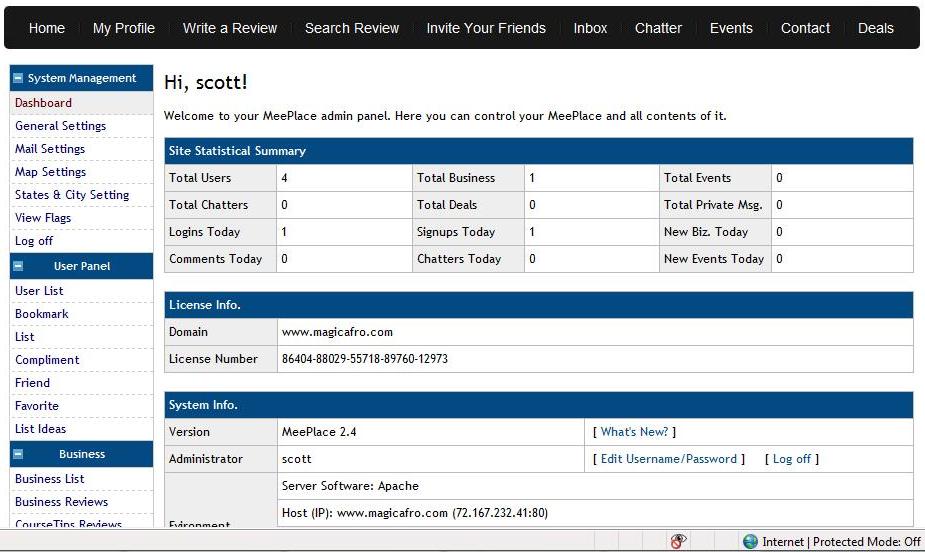
Next, you will be asked for the database information you obtained previously. Only a couple of steps left! You will be asked for the email addresses you wish to use, and then you will need to delete the install directory from your web server. When you have walked through these steps, you will be presented with the administration page, which looks like this:
Listings: Here Comes the Data
Now is when it gets more tedious. You shouldn't start out with an empty site, so you will need to input the locations where your site will be focused. This means entering the states and cities for all of the areas in which you will be listing businesses. Once you have entered the locations, you can begin entering businesses. Which brings me to the future of Meeplace...I spoke with Bryan Butvidas, the brains behind Meeplace, and asked him about the software and his vision for the future. He created Meeplace "to give the average non-coding Joe or the advanced coder the ability to run their own business review site without having to pay $4000 in development."
He is constantly adding improvements and features to the software. Upcoming features include a database of every business listed in the United States, which administrators will be able to pull into Meeplace and select which categories, states and cities they wish to import. Meeplace will also soon feature a theme and module store, similar to those that Drupal provides.
 Find a programming school near you