If you're a hobbyist or an entrepreneur looking for a way to quickly get a Web site up and running with a professional CMS, then this article is for you. In it, I explain how to publish content to the Web quickly and efficiently with the open-source, vendor-driven Magnolia CMS. Magnolia is a highly scalable CMS written in Java. Built and maintained in Switzerland by Magnolia International, it is popular with developers of both small and large Web sites because of its easy-to-use graphical tools and its large library of standard templates.
Read my previous article "Set Up the Magnolia CMS for Web Content Creation in Just a Few Clicks" for a complete introduction to Magnolia and instructions for setting it up.
Let's get started!
Understanding Magnolia Templates
All Magnolia CMS pages are rendered from templates, which are skeletal Web pages (or sections of Web pages) that can be dynamically replaced with content. Typically, a Magnolia developer creates and registers templates for the different types of pages or sections on a Web site. Authors can then select these templates using the Magnolia AdminCentral Workspace control panel and populate them in the WYSIWYG editor. Magnolia will automatically merge the two at run-time to produce a composite HTML page.
Typically, a Magnolia template is composed of both a template script and a template definition. The template definition is an entry in the Magnolia templating module, which references an actual template script. The template script, which is usually written in JSP or FreeMarker, contains the HTML markup and JSP code necessary to render the page (it's actually a little more complicated than this; review the Magnolia templating guide for more information).
However, this doesn't necessarily mean that you need to be a JSP programmer in order to use Magnolia. Magnolia comes with a set of pre-defined templates for common use cases, known as the Standard Templating Kit (STK). This kit, which is freely available from the Magnolia Web site, makes it possible to start creating a Magnolia-based Web site without any special programming knowledge (other than perhaps basic HTML and CSS skills).
To get started with the STK, download it from the Magnolia Web site, shut down the Tomcat server and extract all the JAR files from the download archive to the $TOMCAT/webapps/magnoliaAuthor/WEB-INF/lib folder. Next, restart the Tomcat server and browse to the authoring instance's home page at https://localhost:8080/magnoliaAuthor. You should see a message asking you to update your Magnolia installation, as shown in Figure 7.
Figure 7: Updating the Magnolia Installation with the STK
Start the update process, and the installer will begin installing the STK to your Magnolia authoring instance, together with a couple of demo projects that illustrate its capabilities. When the process is complete, log back in to the Magnolia AdminCentral, and you'll see a number of new menu items, as well as some new templates and projects. Figure 8 illustrates.
Figure 8: The Magnolia AdminCentral Workspace with the STK and Demo Projects Added
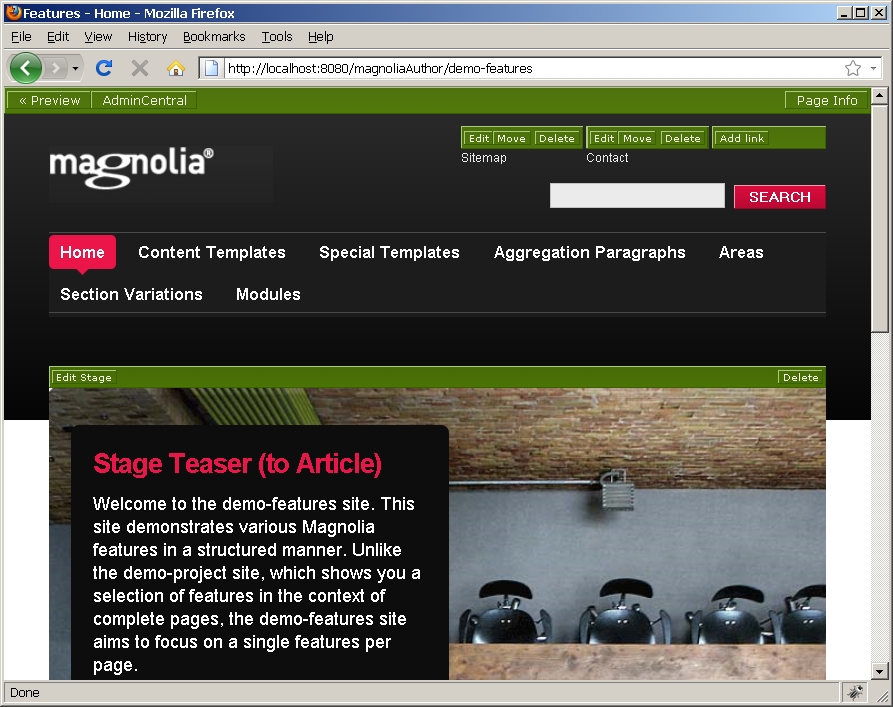
This is also a good point to look through the two demo projects, which illustrate some of the templates available in the STK. You will be able to access these projects by browsing to the URLs https://localhost:8080/magnoliaAuthor/demo-project/ and https://localhost:8080/magnoliaAuthor/demo-features/, respectively. Figure 9 illustrates what you should see.
Figure 9: The Magnolia STK Demo Project
Create the Site Structure
Now that you've got all the pieces installed and configured, it's time to take Magnolia out for a spin. With the STK in place, creating a content-driven Web site is a simple point-and-click process. To illustrate, assume for a moment that you run a store that sells food, toys and other equipment for household pets. Business is good, and you're now thinking of investing in a Web site that allows you to attract customers from outside your local market.
This Web site should contain basic contact information, an enquiry form and a basic product catalog. If you were to define the site structure as a tree, it would look something like this:
1. Home
1.1. Product Catalog
1.1.1. Dogs
1.1.1.1. Dog Food and Chews
1.1.1.2. Toys
1.1.1.3. Collars and Leads
1.1.1.4. Kennels
1.1.2. Cats
1.1.2.1. Cat Food
1.1.2.2. Baskets
1.2. About
1.2.1. Address and Opening Hours
1.2.2. Inquiry Form
To build this Web site with Magnolia CMS, the first step is to create a similar tree representation of your site in the AdminCentral -> Website workspace. To do this, use the AdminCentral -> Website -> New Page command to create a hierarchical set of pages, with each page corresponding to a node in the tree above. Each page is created with sensible defaults (for example, the root node is called "Home"), and you can double-click each node value in the graphical interface to change its name, title and associated template. Templates can be selected from a drop-down list, as shown in Figure 10.
Figure 10: Defining the Site Navigation Tree
Notice that each page is linked to a particular template. For example, the "Address and Opening Hours" page is associated with an "Article" template, while the "Enquiry Form" is associated with a "Contact Form" template. These templates are all part of the STK and should be assigned manually by the content author based on the requirements of each page. You'll find a complete list of templates supported in the STK here.
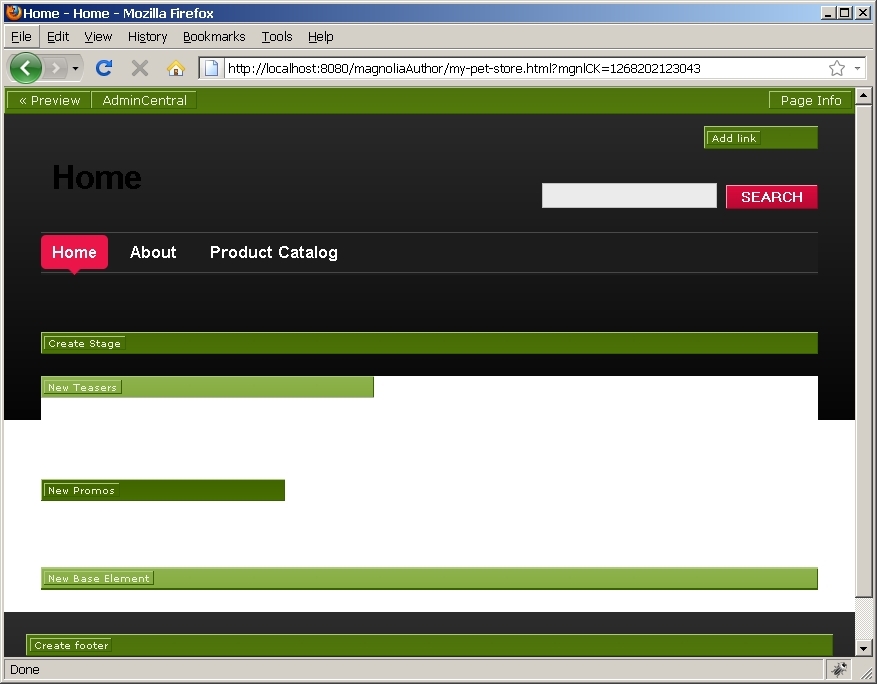
The page hierarchy that you create in this step is used to create the site's navigation menus, and link each menu node to the appropriate page. Magnolia will do this for you automatically; you can see the results by selecting the "Home" page node and then using the AdminCentral -> Website -> Open Page command to preview the page. You should see something like Figure 11.
Figure 11: The Default Home Template with Site Navigation Included
As Figure 11 illustrates, Magnolia has automatically created a site navigation menu whose hierarchy mirrors the node tree created in Figure 10. And if you click through the various menu options, you'll see that a skeletal structure has already been prepared for each page based on its selected template.
Create the Home Page
When the site structure is finalized, it's time to begin adding content. Start with the "Home" page, and launch the preview window by selecting the page node in the AdminCentral -> Website workspace and then using the AdminCentral -> Website -> Open Page command. You should see something like Figure 12.
Figure 12: The Default Home Template with Editing Controls Displayed
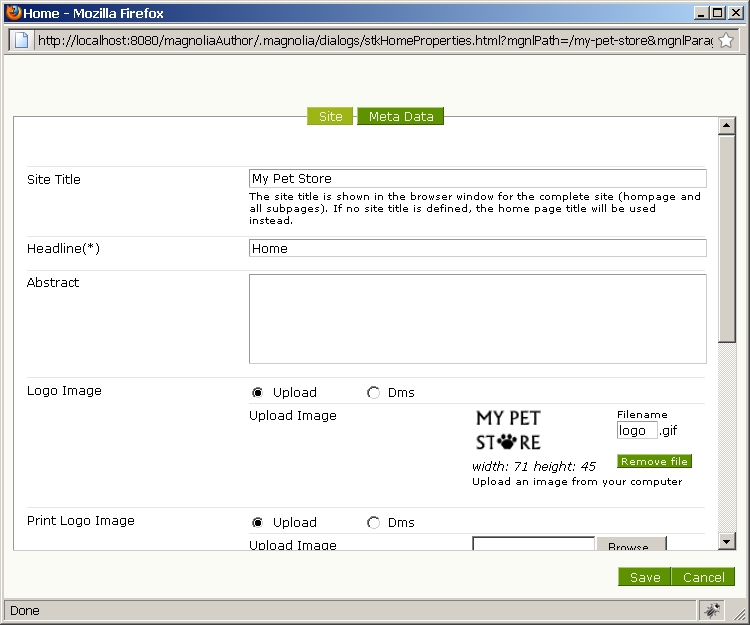
Notice that each sub-section of the page contains clickable buttons. Clicking these pops up a dialog box that allows you to define the properties of that sub-section. To illustrate, click the Page Info button in the top right corner, and you'll be presented with a dialog that allows you to set page properties (such as the logo image and the page title, abstract and meta-data) whether or not the page should appear in the navigation menu. Fill these fields in and save your changes. The preview window will instantly update itself to reflect the modifications.
Figure 13 has an example of how the dialog box may be completed.
Figure 13: Configuring the Home Template
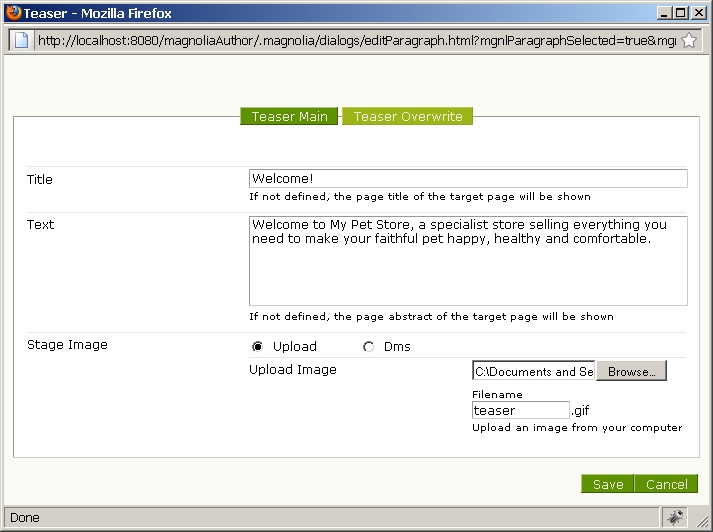
In a similar manner, you can edit the splash image and text that appears on the home page by clicking the Create Stage button and entering a "stage teaser", which contains splash text and a corresponding image. Figure 14 presents an example.
Figure 14: Configuring a Stage Teaser
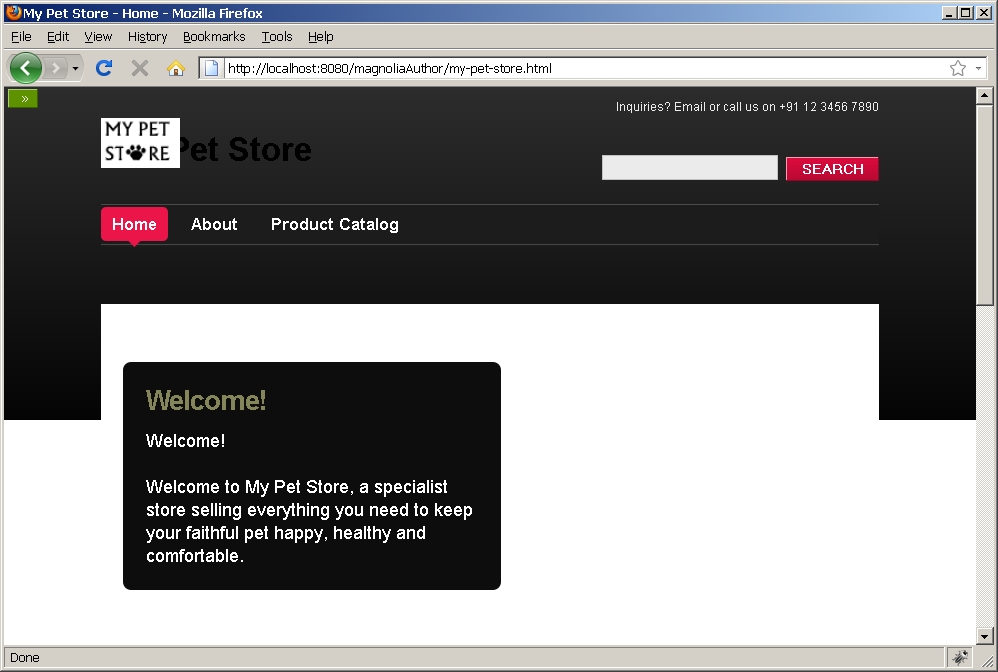
Now, edit the other sections of the page in the same manner, as per your requirements. Figure 15 displays an example of the final result.
Figure 15: The Populated Home Template
Create Content Pages
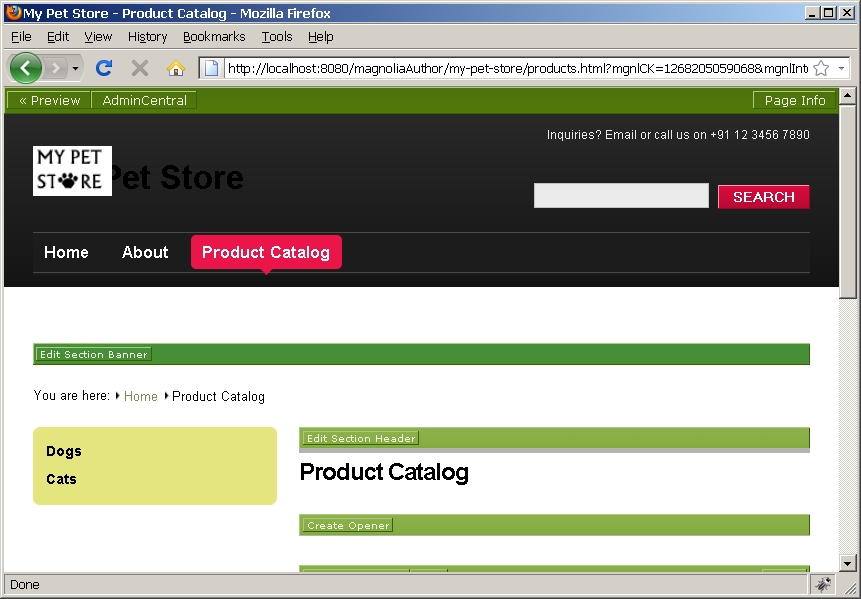
When you've got the home page defined, it's time to create content pages. As you might imagine, this too is extremely simple. To begin, select the "Product Catalog" main menu link, and you'll be taken to a page like the one shown in Figure 16.
Figure 16: The Default Section Template with Editing Controls Displayed
This is the section template, which allows you to place an overview and description of the section, as well as present links to articles within the section. Click Edit Section Header and enter a title for the section. Then, click New Teasers and select the Teaser Group - Horizontal Tabbed style to create a tabbed set of teasers with information on each product category. Figure 17 illustrates.
Figure 17: Configuring the Section Template
Figure 18 shows what the result will look like.
Figure 18: The Populated Section Template
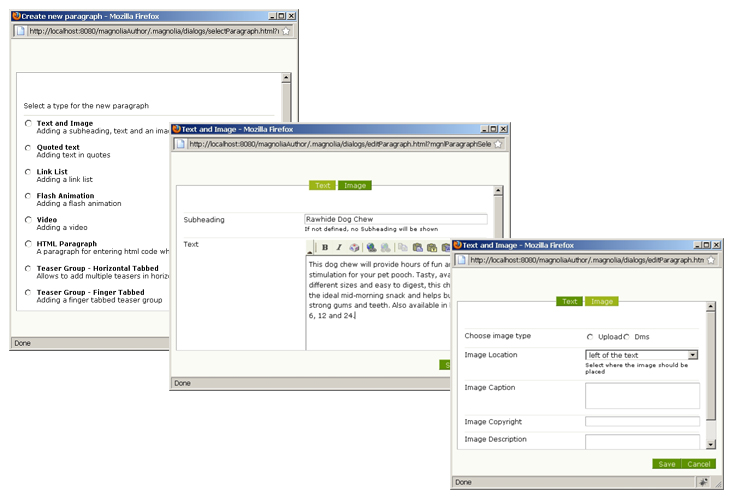
You can now proceed to define the products in each category, as individual articles. To do this, select the page in the vertical navigation menu and, on the resulting skeleton template, use the New Content link to add new content to the page. Figure 19 illustrates the options available when creating new content.
Figure 19: Configuring the Article Template
Figure 20 illustrates an example of the result.
Figure 20: The Populated Article Template
In a similar vein, it is possible to add content for the other pages as well. A number of possible layouts are available, including sections with and without headers, with and without extras and promos, and with and without images.
 Find a programming school near you