Web Photos that Pop 5 pg 5: Production Graphics with Wendy Peck at webreference.com
 |
Web Photos that Pop 5: Sharpening Images | |
|
|
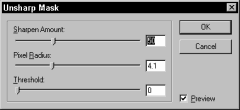
The final topic for this discussion, and possibly the most important we will cover, is sharpening. When images are scanned, imported from digital cameras, or reduced in size, the details begin to blend together and edges become soft. It is a rare image that does not need some sharpening. The sharpening tool that is most useful for photographs is the Unsharp Mask, now available in most raster programs. The Unsharp Mask searches through your image looking for where colors change, and sharpens those areas. The Unsharp Mask is superior to any other sharpening because it makes decisions based on adjacent pixels, not random color changes, so it usually can find and sharpen just the true edges of color areas. The Unsharp Mask generally comes with three settings. The first is the quantity of effect that the filter adds to the image. For Web images, the amount of sharpening required is always significantly less than for high quality printing. Monitors display images at 72 dpi, while printing commonly reached 2500 dpi and above. The larger pixels for monitor viewing require less sharpening. The second value for sharpening is Threshold or Clipping. The Threshold value determines what level of color change the program will accept for sharpening. A value of 0 sharpens all pixels in the image, and as the number increases, the amount of contrast between pixels increases before they are considered for sharpening. Finally, the Radius value determines how many pixels around the area to be sharpened will be included. For Web images, this value should remain quite low considering that 72 dpi features large pixels. The images at the left illustrate the image quality that sharpening can deliver. The top photo is typical of a scanned or reduced image. Although it does not look too bad when seen alone, beside its sharpened version, the difference screams out. |
|
 |
Images can easily be over-sharpened. When you take it too far, a "ghosting" begins to appear around the edges, detracting from the overall appearance. The image at the left has been severely over-sharpened. Note the white around the edges that is almost forming an outline for each sharpened area. Be careful with Web images, and keep the Threshold or Clipping value low. Check your preview carefully as you set the values. Practice does help to develop the knowledge of how far to sharpen images. |
|
|
|
Sharpening Images in Photoshop |
|
|
|
Sharpening Images in Paint Shop Pro |
|
|
|
Sharpening Images in Fireworks |
|
|
This has been a tiny selection of photo improvement techniques. Master all that is here, and I especially encourage you to read your software's manual and online help sections for more information. With these techinques solidly in hand, you will produce exceptional images. Make sure you remember to optimize your images. You can find information on optimization in Graphic Underworld: Looking Behind the Pretty Pictures. |
||
|
|
Web Photos that Pop: Tutorial IndexDon't Be Scared by Print Instructions |
Created by Wendy Peck,
URL: https://www.webreference.com/graphics/column49/
Created: July 10, 2001
Revised: July 10, 2001


 Find a programming school near you