Web Photos that Pop 5 pg 3: Production Graphics with Wendy Peck at webreference.com
 |
Web Photos that Pop: Enhancing the Midtones of an Image | |
|
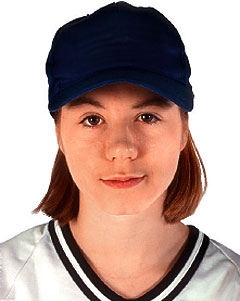
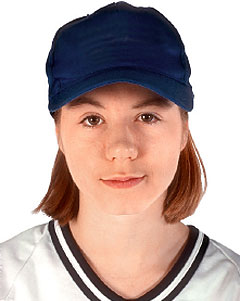
Although this portrait is reasonably good quality, lightening the midtones helps to even the color and enhances detail.
The two images shown here are identical, except that the lower one has the Levels mid-tone value adjusted. |
Scanners are notorious for adjusting the tonal balance of an image. Every image contains some colors that fall into a dark classification, some that must be classed as light, and the remainder of colors, often the majority, falling into a mid-tone range. One of the most common adjustments that designers make to images to improve quality is to lighten midtones. I use levels control to adjust midtones. Levels also allows adjustment of dark and light tones, but I generally find that brightness is best adjusted with contrast. The image at the left is not terrible. However, compare it to the enhanced image, with the only change that the midtones have been lightened. Notice how the detail in the cap is now easily seen. The girl's skin tone is more realistic, and the features more defined. Even the hair seems to have more life. Unlike adjusting the brightness or contrast of an image, the dark and light tones remain the same. If I had lightened the image to bring out the face area, the hat and trim on her shirt would have washed out. Adjusting midtones leaves the upper and lower contrast levels intact, and simply lightens or darkens the tones in the middle range. Check the light spot just under the girl's chin. It is the same before and after the adjustment. If I had just brightened the entire image, that spot would have become too bright, almost like a light coming from under her chin. Adjusting only the midtones often leaves the tones that create the detail intact, while making the rest of the image more appealing. Adjusting levels may send you back to tweak the contrast adjustment. This is a common work pattern when working with image enhancement. One adjustment improves the image, but causes the need for a small adjustment in another value. Balancing the midtones in your image is unlikely to provide the dramatic results that adjusting contrast will, but it is a subtle adjustment that has saved many images for me. Be careful with this control. It is easy to get carried away and wash out the detail in your image. Of course, if you have a photo that is washed out, darkening midtones can help to add more detail and texture to revive the image. |
|
|
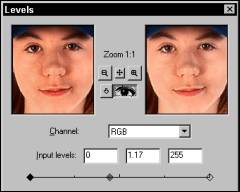
Levels window in Photoshop. Levels can be adjusted with the slider below the diagram, or numerically. |
Adjusting Midtones in Photoshop Select Image> Adjust> Levels and the Levels window will open. Click on the middle slider, just below the diagram in the Input Levels section of the window, and move to the left to lighten midtones or to the right to darken. (As an aside, and too involved for the level we are working with here to discuss fully, the diagram in this window is a graphical representation of the distribution of colors in the document.) If the Preview option is checked, you can preview the results of the settings you use in the document. To view the original so you can see your progress, uncheck the preview window. Toggle back and forth to compare the original to the settings you have currently set in the Levels window. |
|
|
Adjusting mid-tone values in Paint Shop Pro. |
Adjusting Midtones in Paint Shop Pro Click on the Preview button to preview the results of the settings you are using. To view the original so you can see your progress, click again on the Preview window. Toggle back and forth to compare the original to the settings you have currently set in the Levels window. Click OK to accept the settings. |
|
|
Levels window in Fireworks. |
Adjusting Midtones in Fireworks To adjust midtones in Fireworks, Select Xtras> Adjust Color> Levels and the Levels window will open. Click on the middle slider, just below the diagram in the Input Levels section of the window, and move to the left to lighten midtones or to the right to darken. (As an aside, and too involved for the level we are working with here to discuss fully, the diagram in this window is a graphical representation of the distribution of colors in the document.) If the Preview option is checked, you can preview the results of the settings you use in the document. To view the original so you can see your progress, uncheck the preview window. Toggle back and forth to compare the original to the settings you have currently set in the Levels window. If you are interested in photo enhancement, and certainly if you would like to add print projects to your lineup, you should research more on the subject of adjusting tones. To master all the ins and outs of photo manipulation requires a long time, and masses of experience. However, the one tone adjustment I have included on this page will help to improve almost all images you will require for the Web. We will carry on now to color saturation and hue. |
|
|
|
Web Photos that Pop: Tutorial IndexDon't Be Scared by Print Instructions |
Created by Wendy Peck,
URL: https://www.webreference.com/graphics/column49/
Created: July 10, 2001
Revised: July 10, 2001


 Find a programming school near you