Graphic Underworld pg 3: Production Graphics with Wendy Peck at webreference.com
 |
Graphic Underworld: Vector to Raster for the Web | |
|
As we saw on the previous page, the concept of vectors and raster images is really quite simple. If you have a vector and a raster-based program to work with, you will quickly get a feel for which program you can most effectively apply to each situation. In my case, much of my design is very clean that is my natural style. I work in a vector program to start and many times, unless texture or depth is required, will never go to a raster program as I design my sites. People who design with a lot of texture from the beginning may find no real benefit to using vectors, since raster programs are far superior for texture and 3D effects like drop shadows or embossing. |
||
|
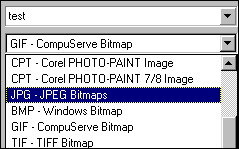
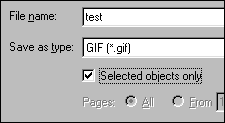
Export to a raster format in CorelDraw by choosing File>Export and select the file type. You can export only the objects that are selected in the document when you activate the Selected Only option.
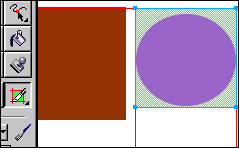
As with CorelDraw, Freehand offers the option to export only the objects which are selected in the document. |
If you are designing for the Web however, you may complete your design in a vector program, like Illustrator, Freehand, CorelDraw or Fireworks, but you must eventually convert the results to raster format. At present, you cannot use a vector file format within an HTML page. (SVG, or Scalable Vector Graphics, is a vector format designed for the Web. However, we are so far from universal recognition of this format, that it is still accurate to say that only raster images apply for Web development. However, you can read more about it at W3C or Adobe.) The process of converting from vector to raster is called rasterizing. Although it sounds like a great geek work, or one that is perfect for a BS generating program, the word accurately describes the process. The mathematical mapping information in a a vector file is converted to a pixel-by-pixel, or raster style. Exporting to raster format from a vector program In Illustrator, you must build your document in layers and turn off other layers to export specific objects. I have found it faster for simple documents to simply copy an object. I then create a new document and paste the object(s) I copied before exporting. I rarely save the document used for exporting. You can also use Image Ready for slicing objects, which is a very similar process to the Fireworks method that follows. When exporting from a vector program to a raster format, you will be asked to specify the resolution, since vector programs work without regard to resolution. For most Web work, 72 dpi is the accepted standard. You can also specify the final size for your export in most programs. Each of the major vector programs offer different options for rasterizing. For example, Freehand does not have a scaling option, but does offer a wonderful adjustable anti-aliasing level. We could fill this entire tutorial with the simple export of raster formats from a vector program, but we have other topics to tackle in this discussion. The best way to learn what your program can offer is to experiment with the settings. Each designer's style tends to demand different settings and you will quickly find the options that provide the best results for your graphics. |
|
|
|
Exporting with Fireworks Carry on to sort out when raster or vector format is best. |
|
|
|
Graphic Underworld Tutorial IndexGraphic Underworld Start |
URL: https://www.webreference.com/graphics/
Created: August 5, 2000
Revised: August 5, 2000


 Find a programming school near you