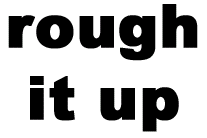
Rough it Up pg 2: Production Graphics with Wendy Peck at webreference.com
 |
Rough it Up 2: PhotoShop Outline | |
|
 Arial Black with noise added to a 2 pixel edge. Add Noise filter: Amount 400; Distribution Gaussian; Monochramatic On. |
This entire tutorial could be filled with methods and ideas to use PhotoShop for rough graphics. It is ideally suited to this application. I will cover the basics, though, and encourage you to experiment with different brushes and filters to acheive unique effects. The possibilites are endless. Let's start with one of the most important steps to many rough techniqesselecting an outline. We will use the outline selection to apply filters and actions to just the outer portions of objects with any shape, including text. There are "rough" fonts available, but often you want a clear, easy to read font, perhaps matching your main font, but with an extra touch. In the following samples I have used Arial Black, a very traditonal font, but you will see it take on many faces. |
|
|
|
|
|
|
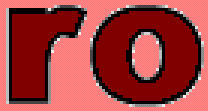
Anti-aliasing grays excluded from selection.
Left: Selection borders showing in regular mode. Right: Same selection with Quick Mask turned on.
Top: Final selection for outline. Bottom: Same selection with Quick Mask turned on. |
Select an Outline Selecting an outline takes a few steps, but will look more difficult than it is. Follow step-by step and it will make sense. Double click the Magic Wand tool to open the Magic Wand options window. Set Tolerance to 1 and turn off Anti-alias for accurate selection. Click the Magic Wand in the area outside the text to select the background. Although we want an area selected for a text outline, we will get a more accurate selection by choosing the backgound. The text anti-aliasing adds a few levels of gray. Choose Select>Similar from the Main Menu. This will select the areas inside text characters. See the illustration here and note how the selection is excluding the anti-aliasing pixels. Choose Select>Modify>Expand and type in the width you desire
for your outline, in this case 2. I have included an illustration of
the selection, and one of the same letter, but with the Quick Mask Finally, to create the outline, you must remove the background area from the selection. Choose the Magic Wand. Hold the Alt (Option) key down and click on the background. Repeat for areas inside the letters. Check results with the Quick Mask. The last two images here show the outline area selected. In the first, the selection boundaries illustrate the outline area, or the area that can be edited. In the second, the Quick Mask illustrates that only the outline area is unprotected from editing. Both give the same message but the mask view is often easier to see. A simple technique that takes a lot of words to explain. Now that we have the outline area selected, we can add rough edges to it.
|
|
|
|
|
|
Rough it Up Tutorial IndexRough it Up Start |
URL: https://www.webreference.com/graphics/
Created: Mar. 1, 2000
Revised: Mar. 2, 2000


 Find a programming school near you