CorelDraw 101: All About Outlines
 |
CorelDraw 101: All About OutlinesOutline Tool Overview |
|
|
|
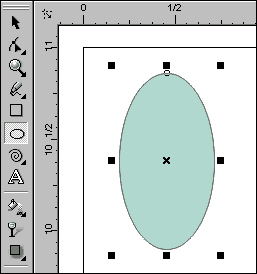
Create Ellipse Choose the Ellipse Tool from the Toolbox. Click and drag to create an oval shape, longer than it is wide. Choose the Pick Tool. Click on any color in the color palette to fill the oval. This tutorial is a quick tour through outline features as an overview of what the Outline Tool will do. See individual steps for step-by-step instructions on techniques. |
|
|
|
||
|
|
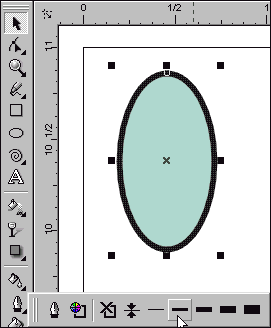
Change Outline Width Choose Pick Tool from the Toolbox. Select the oval. Choose the Outline Tool from the Toolbox and a fly-out will appear. You can click and drag on the fly-out to detach the the fly-out for easy access to outline settings. The second section of the fly-out contains 6 preset outline widths, including a no outline setting. Click on several to see the result on your oval. |
|
|
|
||
|
|
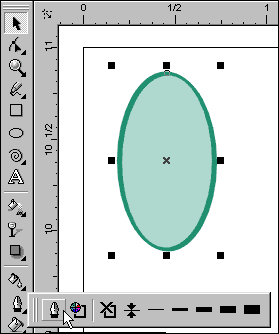
Change Outline Color Choose the Pick Tool. Right click on any color in the color palette to set a new outline color. You can also set the color through the Outline Tool. |
|
|
|
||
|
|
Create Calligraphy Effect Choose Pick Tool and Select Oval. Choose Outline Tool to open the fly-out. Choose the Outline Pen Dialog icon to open the Outline Pen window. Set Stretch and Angle in the Calligraphy section. This sample uses a 50% stretch and a 60-degree angle. Calligraphy outlines add a drawn look to objects. See Calligraphy for step-by-step instructions and variations. |
|
|
|
||
|
|
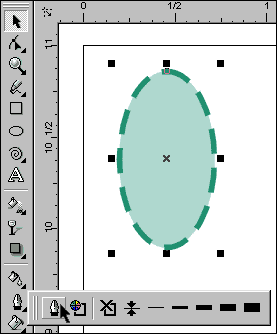
Set Outline Style CorelDraw offers many outline styles, from dots to dashes and combinations. Combined with width and calligraphy effects, the range of effects is unlimited. With your object selected, click on the Outline Tool to open the fly-out. Click on the first icon to open the Outline Pen window. Choose style. Try several variations to become familiar with the styles available. |
|
|
|
||
|
|
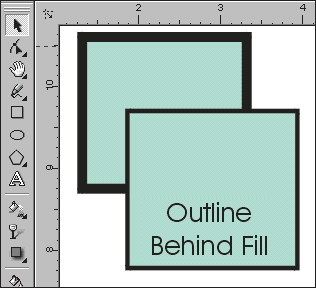
Outline Behind Fill The default for outlines is in front of the fill. Occasionally, you may want the outline to fall behind the fill. With your object selected, click on the Outline Tool to open the fly-out. Click on the first icon to open the Outline Pen window. Choose Behind Fill near the bottom of the Outline Pen window. The sample above contains two identical rectangles. The outline width is set to the same value, but the lower rectangle has the outline behind the fill. |
|
|
|
||
|
|
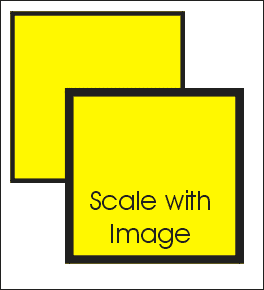
Scale Outline with Object Outlines are set numerically, and will remain the same width once set. But often, the proportion between the outline and the fill should remain the same, even if the image is reduced or enlarged. You can set your outline to remain proportional. Choose Scale with Image near the bottom of the Outline Pen window. The sample above contains two identical rectangles, drawn at a small size with a thick outline and enlarged. The lower sample has been set to Scale with Image in the Outline Pen window. |
|
|
|
CorelDraw 101: All About Outlines Tutorial IndexOutline Tool Overview |


URL: https://www.webreference.com/corel101/5/
Created: April 16, 2001
Revised: April 16, 2001
 Find a programming school near you