Stock Photography for Web Developers: Part 6
Stock Photography for Web Developers: Part 6
By Nathan Segal
Computers and Stock Photography: Part 3
This week we continue our exploration of computers and how they've changed the stock photography landscape. We'll look at concept photography, the power of variations and creating libraries of masked images. To conclude, we take a quick look at the three main file types for the web and how to use them.
The first thing we'll look at today is concept photography, an area of stock photography where finished images are created from various components, much like creating a product on an assembly line.
As an example, consider the images below.
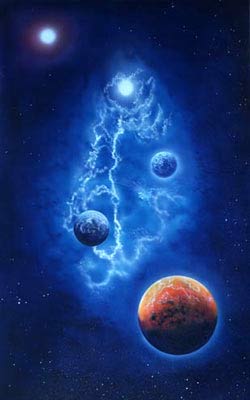
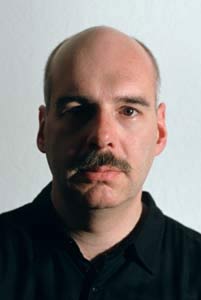
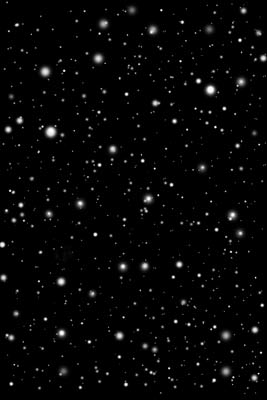
It was the combination of these three images (and star field variations) that produced the finished image below, though it looks like much more.
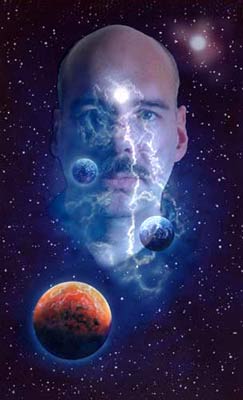
This image makes use of several techniques, including layers, blending modes, masking, retouching, levels, sharpening and more. To elaborate, the space scene is a realistic image painted on canvas, using an airbrush. One of the great things about an airbrush is it gives you the ability to simulate realism and it's absolutely ideal for painting space scenes. (To see other examples of what you can do with an airbrush, have a look at my some of the space scenes on my personal web site.)
The star fields were created entirely in Photoshop using soft and hard brushes of various sizes on a black background. Soft brushes are good for creating nova effects and I use hard brushes for distant stars. I also vary the opacity of the stars to create the illusion of distance and when appropriate, I also color some stars red, blue or even green. To make the star fields work in Photoshop, I layer them using various blending modes. Testing each mode will occasionally yield unexpected results (such as unusual lighting effects), that can add dramatically to the image. In actual practice, some of my best images were the result of a "mistake."
What you're looking at above is an example of photographic concepts, one of the many categories available in stock photography. It also demonstrates what you can do with image components. When I was part of a design team in years past, we would mask various objects, allowing us to use them over and over in different images, thereby maximizing the value of the components. We also created variations in both vertical and horizontal formats so as to maximize the marketing potential.
To see examples of what I'm talking about, have a look at the IndexStock web site.
Type in the word "space." As you click on the various galleries around pages 8 and 11, you'll seem many examples of image variations. What's more important than the finished image is to have a large image library of components, as we did, that allowed us to create new images quickly and easily. Digital files don't take up the kind of space that transparencies would and they're easily accessible. If you want to use slides you have to scan them, check them for dust, retouch them, etc.
One thing I should point out is that what we did is an exception to the rule, where several of us worked as a team. Usually you'll find one individual who produces a large body of work. While our approach gave us many creative options, it also diluted the royalties we could collect, meaning that we had to produce many more images to compensate.
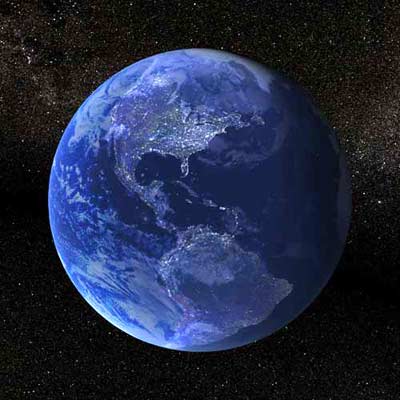
In recent years I've begun to work with 3D to create concept imagery. 3D, as mentioned in the previous article, is an ideal way of expanding upon that market. The image below is a relatively simple example of how you can use 3D to your advantage. In this case, the "world" was created using a sphere primitive in 3DS Max, upon which I layered a satellite composite of the Earth, clouds and a nighttime map of lights. To see different parts of the world, all you need to do is rotate it and use camera effects to zoom in as necessary. You also have the ability to render the image in muliple file sizes for the web, print, film or video. You can even output the scene in layers, that can be further manipulated in Photoshop.
In 3D, you have complete control over the lighting elements and you can create a wide variety of effects. Animation is also an option but that goes beyond the focus of these articles.
If these possibilities weren't enough, you can build your own 3D scenes entirely from scratch. That's great if you love a technical challenge, but it's not always the best approach. As an example, if I want to create an object and I want it done quickly, I research stock 3D image libraries which carry a wide variety of objects and textures. A few of these resources are Mesh Factory, 3D CAD Browser and Turbo Squid. All of these offer various options for purchasing and using images in your scenes.
File Sizes for the Web
Briefly, there are three main file types for still images on the web: JPEG, GIF and PNG. A JPEG image is a 24-bit file format best used for compressing photographs, realistic artwork and grayscale images. Making images smaller is important for fast loading pages.
There are a couple of ingredients I use to make this work well, image size and compression. For the web, an image with a pixel count of 500 in either the vertical or horizontal axis is about the largest I like to use for photographic work. In addition, I like to use a compression setting of 30 and to make sure that my file sizes are no more than 20K, if at all possible.
Note: An exception to the above rule is for images with relatively few colors, such as a photograph with a sky that's almost entirely blue. In this case you can use alpha channels and "Weighted Optimization" in Photoshop to reduce the JPEG file size even more.
If you're wondering about the reason for the small file sizes, the bigger it gets, the longer the image takes to display, an important consideration for those on dial-up connections. Be aware though, that too much JPEG compression can cause "artifacting," where parts of the image begin to clump together.
Another option is to use PNG files, which aren't lossy (meaning they don't discard data), unlike JPEG. The downside of PNG is that the file size is anywhere from 5-10 times larger, which is why I recommend using the JPEG format instead.
For lettering, simple cartoons or line drawings, the GIF or PNG-8 format is the next best option. Both are an 8-bit format and they allow you to choose the number of colors you want in an image. The result is a small file, sometimes only a few kilobytes in size, making the images ideal for fast loading.
Moving On....
In the next article, I'll go deeper in to my experience of stock photography.. Among other things, I'll talk about the state of technology then and now, the limitations we faced and how we overcame them, royalty splits and what it takes to get involved with stock photography now.
About the Author
Nathan Segal is an Associate Editor for WebReference.com. He is an Artist and Writer who has been writing for computer and photographic magazines for 8+ years. His specialty is taking complex methods and explaining them in clear, easy-to-understand terms. To learn more about his work and background, click here.
Created: March 27, 2003
Revised: December 19, 2005
URL: https://webreference.com/stock6/1
 Find a programming school near you