When working for a large company, it's hard to know everyone's name, job title, room location and contact information such as phone number or email address. Most companies rely on a spreadsheet of employee names that becomes outdated as soon as the sheet is printed. Most solutions to this problem rely on a Web-based approach. One solution could be posting a PDF file or Excel file to an internal intranet, but the same maintenance pain point exist: every time a change is needed, you have to re-upload the document.
A solution that is more flexible and robust to changes is a Web page that's capable of searching a database of employee names. When an employee is found, his or her name is displayed in a hyperlink that provides further information when clicked. As a developer, if you're familiar with ASP.NET and database-driven pages, this solution is quite simple to implement.
In this article I'll explain how to create a database, create one page that will search for any employee with the specified name or letter, and create another page that will display additional details regarding that employee. To follow along with this article, you'll need Visual Studio 2008 or Visual Web Developer, as well as SQL Server 2005 or 2008.
Create the Database
- Start→Programs→SQL Server <ver>→SQL Server Management Studio Where <ver> is your version of SQL Server.
- Connect to your local database server.
- Create your database by following these steps:
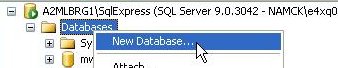
- Right click on databases and select New database as shown below:
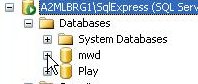
- Give your database a name of mwd and click OK.
- Right click on databases and select New database as shown below:
Create the Main Table
To create our tables, follow these steps:
- Click the plus sign (+) next to your database as shown below:
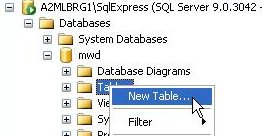
- Right click on Tables, and select New Table as shown below:
Let's create our table, employeedirectory, first. We need the following columns as outlined below:
- ID
- Primary key
- Data type: int
- Not null
- FName
- Data type: varchar(50)
- Null
- LName
- Data type: varchar(50)
- Null
- Email
- Data type: varchar(50)
- Null
- GUID
- Data type: uniqueidentifier
- Not null
- JobTitle
- Data type: varchar(50)
- Null
- OfficeLoc
- Data type: varchar(50)
- Null
Before continuing, make sure to set the primary key by right clicking the column (ID) and choosing Set Primary Key as shown below:
While we're at it, let's set the seed on this column as well by setting Identity Specification to Yes as shown below:

Next, left click the GUID (global unique identifier) column and in the properties window, set default value or binding to (newid()).
Populating Employee Table
Let's populate the table with some data by following these steps:
- Right click on employeedirectory, and select Open
- Enter the following data:
- Record 1
- FName : Jake
- LName : Doe
- Email: [email protected]
- GUID : leave empty
- JobTitle: Director
- Office Loc : 110
- PhoneNum : 2324
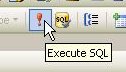
Enter a few more records with different information. After each record, make sure you press the execute button so you get a new GUID as shown in the image below:
Minimize SQL Server Management Studio; we're done with it for the time being.
Open Visual Studio and Create the Project
Let's open Visual Studio from the desktop: Start→Programs→Microsoft Visual Studio. From the main menu, create a new project by following these steps:
- File→New→Project
- In the New Project window, under the Visual C# tree, choose Web and then ASP.NET Web Application.
- In the name text box, name our project EmployeeDirectory.
- Leave Create a directory for solution checked.
- Click OK.
Once the project is created, you'll have one ASPX file and a web.config.
Open web.config and default.aspx
From the solution explorer, double click web.config and look for <connectionStrings>. Replace the default markup with the following:
Simply replace the value inside the double quotes for connection string with your settings. When you are done, save your file.
From the solution explorer, double click default.aspx and remove everything between the opening and closing <form> tags. Replace it with the following markup:
As you can see from the code above, we have the following:
- Heading three to identify the page
- Server-side text box
- Button control
Each control has an ID property value to uniquely identify it. Each one has a runat property value that tells us the control is run by the server first and then HTML output is sent to the browser. On the button, we have an OnClick attribute with a value of btnSearch_Click. OnClick is a server-side event, which means we must have a corresponding event in our code-behind file.
Before doing that, you will also see a placeholder control (with its visibility set to false) with a repeater control inside. Inside the repeater control, we use a hyperlink control. In that control, we use the NavigateUrl property -- passing in the Web page that will view additional employee detail -- and use the Text property and pass in Name, which is coming from our stored procedure query (more on this query shortly).
When a user searches for employees, we'll toggle this to true if an employee is found. If no employee is found, we'll toggle our second placeholder, which tells the visitor there's no employee found.
Let's add the method we need for our button control. From the solution explorer, left click the plus sign (+) next to default.aspx, double click default.aspx.cs and add the following code:
Save your file.
Run the Project
When we initially run the project, you'll see this window:
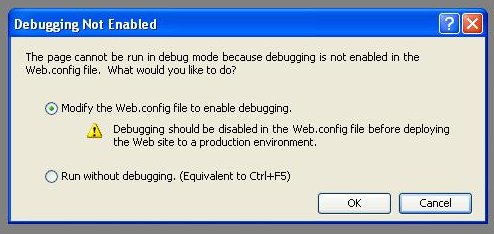
Click OK. Because we have no functionality yet, you should just see the initial screen. When finished, return to Visual Studio and press the stop button.
Implement Search Functionality
Our search functionality works as follows: a visitor will type a last name or a letter of a last name in our search field. They click submit, we pass in the value they enter, issue a query against it, and if we find a match or matches, we'll display the employee last and first name as a hyperlink. If no matches are found, we display our placeholder that has the no records exist message. We could put all this logic in our code-behind file, but that's not recommended. Instead, let's create a class file to handle the data access.Create Our Class File
From the solution explorer, follow these steps:
- Right click the solution directory and choose Add→New Item.
- Select Class file.
- In the name text field, type "EmployeeDirectory.cs" and left click add.
Double click EmployeeDirectory.cs from the solution explorer, which will show the empty class as shown below:
In order to work with our SQL database, we need to import the following libraries:
As you can see from the code above, we added three. The first allows us to work with stored procedures in ADO.NET, the second allows us to reference a connection key from our configuration file and the last allows us to connect to SQL Server.
Creating Our Declarations
Let's first add class-level variables so that we can get or set our data. Add the following code:
As you can see from the code above, we added a region that holds our class-level variables. These variables match our columns from the database table.
Creating Our Method
We know that our method in this class needs to accept an argument, which is a string from our search box. We also know this search could bring back one or multiple matches. As a result, our method needs to create and store a generic list object and then return that to our code-behind file. Let's add the following code:
As you can see from the code above we do the following:
- Create a generic list method named
GetEmployeesViewand pass in the value from our search text box. - Create a connection object and pass in our key from our configuration file.
- Create a command object and pass in our stored procedure along with our connection object.
- Set our command object to accept stored procedures.
- Create a SQL parameter, pass in our parameter from our stored procedure and the parameter's data type.
- Add our parameter to the command object.
- Create a generic list object named employees.
If we can't connect to our database or read through the results from our query, we wrap the following in a try/catch block, which handles exceptions:
- Call the open method of our connection object.
- Create a data reader object, and set the command object's execute reader method to it.
- Inside our while loop:
- Create a new employee object.
- Assign each of our class-level variables to the value coming from our data reader object.
- Add each new object to our generic list object.
- Inside our while loop:
- Catch the exception and throw an exception if needed.
- Call the dispose method on our command object and the close method on our connection object.
- Return our list object.
In default.aspx.cs, add the following as shown below:
As you can see from the code above, we create a new instance of the employee directory class.
Within the search method created earlier, add the following code as shown below:
As you can see from the code above, we create a generic list object named employees and set it to our object, ed. From our object, we call GetEmployeesView, passing in our search field. We call TogglePHVisibility, which shows our repeater control and hides the other placeholder control. When our list object gets filled with one or multiple objects, we set the data source of our repeater control to our list object and call the data bind method to associate the data to the control.
Let's write the TogglePHVisibility method as shown below:
As you can see from the code above, we toggle the placeholders appropriately. Save both files and restore SQL Server Management Studio.
A Word About Stored Procedures
Think of stored procedures in databases as blocks of SQL code that have been executed against the database. This is great for multiple reasons, including:
- Because the SQL code is executed against the database, it's already indexed on the database and knows the tables it needs, which means performance is enhanced.
- Because we're calling the function in our application, we aren't executing a SQL query from our application, which is faster than embedding SQL.
- If a change is needed to the query, you change it in the saved SQL file rather than in our business layer.
 Find a programming school near you