Photoshop and PSP Channels pg 3: Production Graphics with Wendy Peck at webreference.com
 |
Photoshop and PSP Channels: Splitting Channels in Photoshop | ||||
| So, you know know how to view the separate channels, and how to keep a composite on the screen so that you do not have to work blind. Let's turn up the heat a little bit. What if you are feeling really brave, and want to actually split the image into separate color documents? Photoshop delivers! | |||||
|
This image was created by taking the original image, which you can see below and splitting the channels. The channels were then merged, but the red and green channels replaced each other. See the original image. |
Why would you want to do that? For most channel work, you would not. If you are just cleaning up an image by applying filters or adjustments to individual channels, there is no reason. But what if you really like the grayscale effect of one of the channels? That happens there are times when I love the effect of just one channel. If you split the channels into individual documents, you can do what you like with the resulting document. You can also use channel splitting to create special effects like the image I show to the left. (Click here to see the original these two images cannot appear on the same screen without making you seasick.) For this image, I took the original, split the channels and then merged them with the red and green channels inverted. That is, the original red channel became the new green, and the original green channel is now the red channel. You cannot do that when you have your channels all together in one document. In fact, you cannot even change the order of the channels. (It would be a pretty poor RGB model if the channels went blue, red, green.) |
||||
|
Splitting channels |
|||||
|
|
It is a good idea when learning a new technique to protect your original image (Photoshop does a good job of changing file names, but I still like to know that I have the original tucked safely away from my experiments.) Save your image with a new name, or create a duplicate by selecting Image > Duplicate. Open the Channels palette. Click the triangle at the right side of the Channels panel and choose Split Channels from the drop-down menu. Your original image will disappear, and three new documents will appear on the screen. Check the filenames in the title bars of the images. Each has a different name, derived from the original image name, "morning" in this case, with the addition of an R, G or B, representing the color channel that created the document. You should also note that the new images are all grayscale images.
|
||||
|
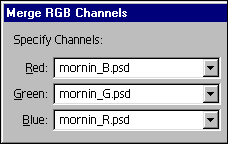
Stepping through the process to merge channels. With the settings above, the blue and red channel will be exchanged when the image is merged. . |
Merge channels Click on any of the three channel images to activate. Select Merge Channels from the drop-down menu at the side of the Channels palette. The Merge Channels window will open. Select RGB from the drop-down menu, and make sure that the Channels field has 3 for a value. (If either the Mode or Channels fields will not accept the values I gave you, and shown at the left, you have changed the mode for one of the documents from the RGB set.) Click OK. The Merge RGB Channels window will open and you have an opportunity to state how you would like the image reassembled. All three of the split channels are available for selection in each of the channel choices. If you want the the image restored as it was, the default values will deliver that result. Just accept the displayed values and the image will become an RGB image again. |
||||
|
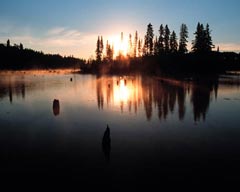
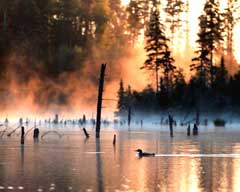
This effect was created by splitting the channels and merging with the red and blue channels exchanged. The original image is shown at the right. Photos © Tom Thomson Photography. An aside: The images in this tutorial are all taken within a few miles of where I live, by Tom Thomson. Tom is a talented and respected photographer, who has worked on assignment all over the world. But home, NW Ontario, is still his subject of choice. These images are a tiny clue as to why we put up with 24k connection speeds. |
The channel names featured in the drop-down boxes are the images that resulted from the split. So "mornin_B.psd" is the blue channel document, "mornin_G.psd" is the green channel document, and "mornin_R.psd," the red channel document. You can see from the screen shot of the Merge RGB Channels window that I have exchanged the blue and red channels to achieve the image you see below the screen shots. The original image (before splitting the channels) is shown above on the right. Let's move on to learn a little more about how channels work and how to work with them. |
||||
Photoshop and PSP Channels Tutorial IndexPhotoshop and PSP Channels: What, When and Why? |
URL: https://www.webreference.com/graphics/column41/
Created: January 21, 2001
Revised: January 21, 2001


 Find a programming school near you